STARFIRE HYPERSONIC AIRLINER
A Belated, Troubled Conversion
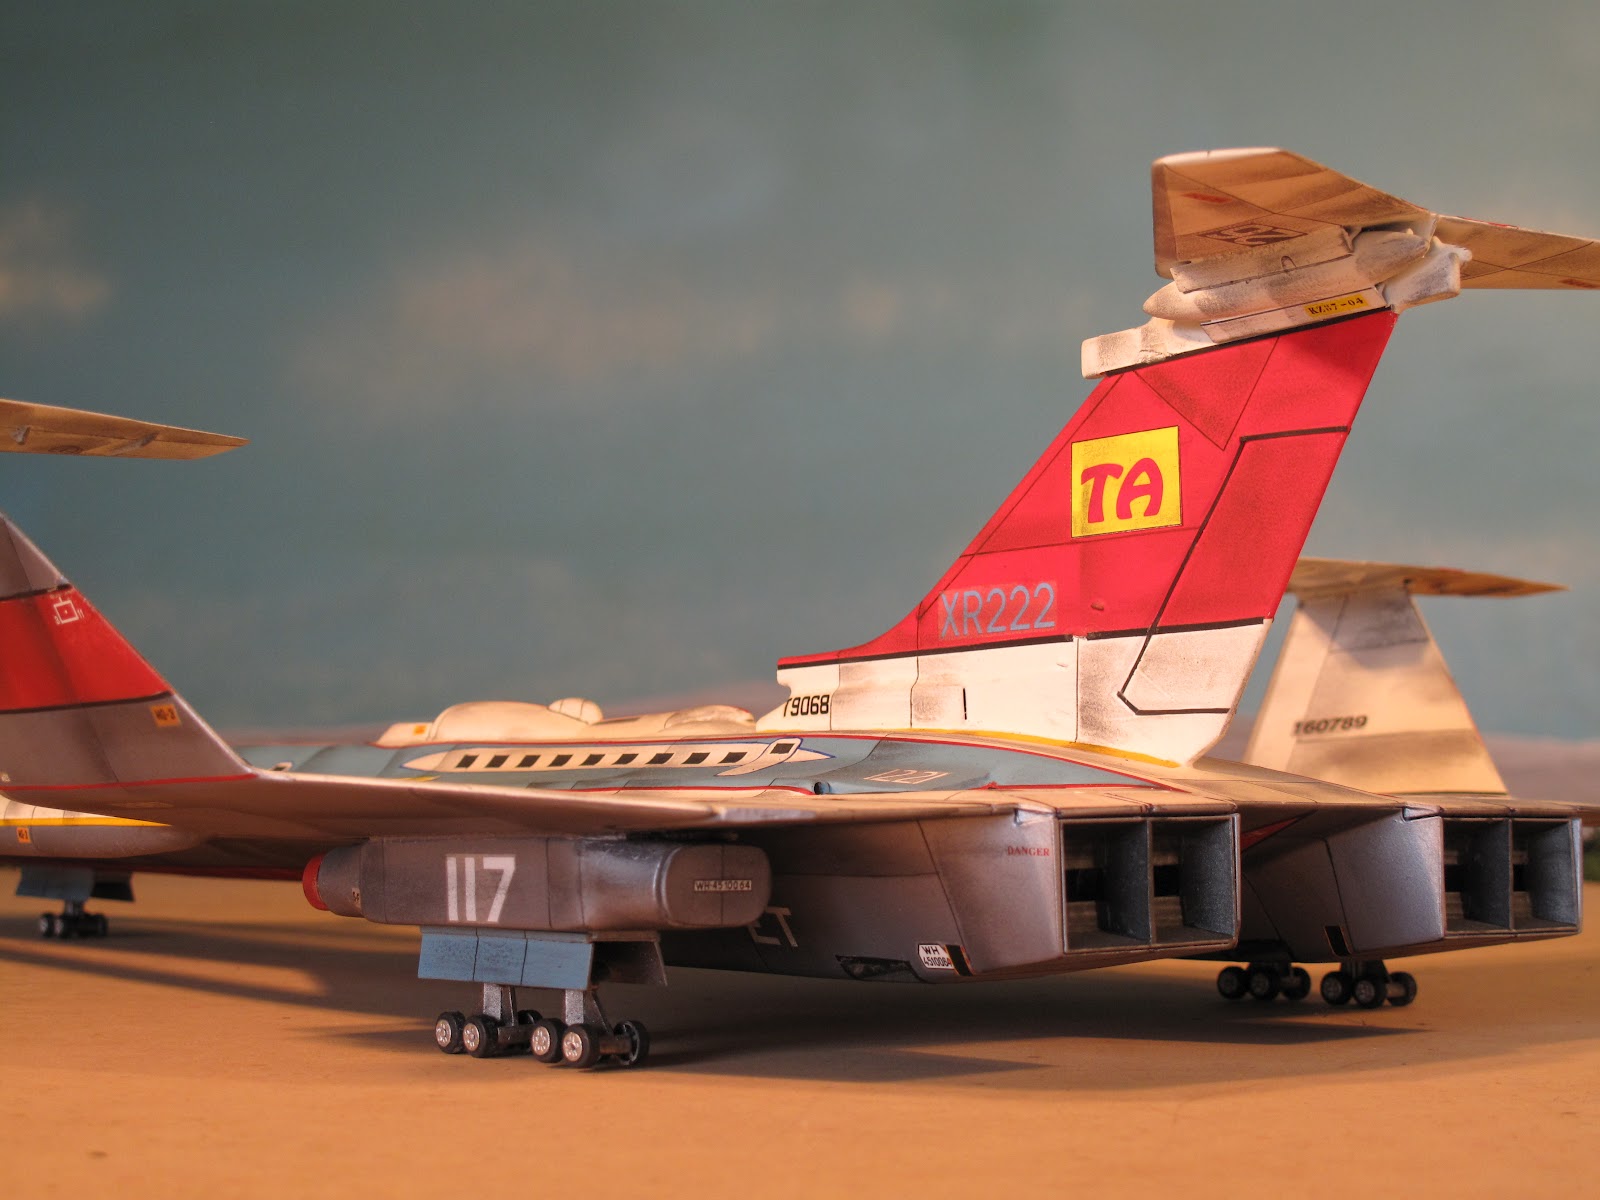
The basis for this aircraft was a conversion begun many years ago from an SR-75 Penetrator kit. Wooden dowel was added, as were extra fins and details, along with copious amounts of modelling putty.


The landing gear, consisting of toy wheels, Evergreen strip and styrene boxes, is removable for photographic purposes and a collection of fins and vertical stabilisers came from other kits.


Secreted along the length of the fuselage is a pair of aluminium tubes that will be used to "fly" the model across the sky when it is videoed. Covering the tubes and fairing them into the body of the aircraft took quite some time. Car putty was used for this particular job as it's incredibly strong, doesn't shrink with age and accepts any sort of paint applied to it. As an afterthought, the highlighter pens made relatively poor landing gear shrouds and I should have put way more effort into designing something less recognisable and then casting the pair of them.


All fins and vertical stabilisers were strongly pinned with lengths of narrow brass tubing and glued into place with Araldite. Additional landing wheel covers were cut from styrene and fit neatly when the landing gear is removed for flying shots. All the decals, lettering and numbers come from a variety of sources, except for the "TA" and "Transworld Airlines" markings which were created in the computer. (One day I'll learn how to create custom decals in the computer and transfer them onto proper decal paper!)


The windows were created using layers of differently painted masking tape and the crew cabin was a converted drop tank from another kit, positioned halfway along the upper fuselage in a homage to one of my all-time favourite aircraft, the "Fireflash" from Thunderbirds.


The windows were created using layers of differently painted masking tape and the crew cabin was a converted drop tank from another kit, positioned halfway along the upper fuselage in a homage to one of my all-time favourite aircraft, the "Fireflash" from Thunderbirds.


With this model I made an unforgivable error. In wanting to keep the base coats perfectly clean and neat looking, I sprayed a clear, matt wood varnish over the surface to protect the paint before the addition of decals, lines and pinstriping. Unfortunately some reaction occurred between the paint and the varnish which forced me to sand areas back and re-apply the paint. Spraying paint over the varnish resulted in even more "crazing" of the surface areas and potentially ruined the model. I was able to cover up most of the poor surface by weathering the aircraft rather too severely for even my liking, but the alternative was to completely strip the model back to the primer and I just couldn't face that daunting challenge. Besides, I had just spent nearly an entire week painting the thing! In the long run the model is way too weathered, however it seems to look okay in photographs as the illumination used to light the model against the sky backdrop tends to wash out a lot of the excessive dirtying down.


awsome how much for one of these
ReplyDeleteGreat! A Gerry Anderson type airliner, with the photography it looks like it came from the "Thunderbirbs" series.
ReplyDeleteOver-weathering is there, but it's a better alternative than stripping and starting over.
I bow to a great builder.