LAUNCH ASSEMBLY BUILDING & LAUNCH PLATFORM AREA
YES, SIZE REALLY DOES MATTER!
Now that the Aurora – Earth
to Moon Shuttle was finished, work moved on to the surrounding launch area,
specifically the structure dubbed the Launch & Assembly Building, or LAB.
Along with that, there was also the launch platform itself which needed to be
large enough to accommodate the shuttle. After locating a thick piece of
plywood, 1.2m X 60cm, I knew I had the base that could support the LAB, the shuttle
and the surrounding area comfortably. After a short search in one of my many
boxes of “goodies”, I came across a quartet of lids from old computer disc
containers and these would become the basic structure for the launch area to be
built upon.
The LAB itself was closely
based on a design by fellow modeller, Keith McNeill, from the UK. In fact,
Keith sent me the dimensions for his 1:200 scale structure, which I promptly
doubled in size for my version. I
needed mine to be large enough to appear quite massive in the short film in
which it was to appear. As well as that, it needed to be about 60cm tall to
match the scale of the Aurora shuttle which was about 1:72.

Paying a visit to my local
hardware shop netted me a sheet of 3mm thick Medium Density Fibreboard(MDF).
Slightly warped in one corner and sitting next to the industrial bin, the sheet
was given to me for free, the very best price to pay! I did purchase some
packets of small wood screws, along with two dozen metal angle brackets, the
smallest size available at the shop. I roughed up the basic size and shape on
paper and then transferred the dimensions to the sheet, cutting out a pair of
identical shapes using a sharp Stanley knife – hard work to say the least, but
necessary if I wanted smooth edges. After cutting out the shapes and sanding
any rough edges smooth, I cut small lengths of 9mm X 9mm square dowelling and
added these to each of the angled sections, exactly 5mm inside the outer edge,
all the way around the perimeters of the two shapes. This was to provide
bracing for sections of 2mm styrene that would become the sides of the
structure. Evergreen strip, #128, would have to be added after the styrene pieces
had been glued on as I wasn’t willing to pay the high price for scribed styrene
to cover such a large area. To give additional support for the building’s tall
shape and to provide an interior that could be detailed with girderwork, a
styrene box was constructed and firmly glued to the inside of the back wall. I
used copious amounts of epoxy glue, timber bracing and six of the metal angle
brackets to securely fix the box into place.


To give a little interest to
the building, I decided to add a pair of flashing beacons to the top and
purchased some lengths of brass tubing and two, 5mm red LEDs. A recent visit to
the doctor had gained me a couple of plastic pieces that were used when viewing
the insides of ears and these were sufficiently interesting enough to become
the bases for the protruding brass tubes. The tubes themselves were passed
through small holes drilled into the interior box, where the LED wires would be
led out through the sides and down to the building’s rear where a small switch
would be installed. The styrene section on top was detailed with various kit
parts, along with the ear-viewing pieces before being sprayed with car primer.


Detailing the interior of
the building required an amount of girderwork that was provided by two kits –
the Airfix Pontoon Bridge and the Hornby 3 Piece Pylon set, along with some
lengths of plastic fencing that were found on the spares box. After a couple of
hours of experimenting and carefully placing pieces into position, grey primer
was sprayed on the see the results. At my local electrical shop I had spied a 9
LED strip that I thought could provide some interior illumination and to
accentuate the girderwork. I bought this for $9.95 and, because the backing was
adhesive, it was easily placed against the back wall in the centre of the
recess, while the wires trailed down to the bottom and out through the back to
connect with the supplied switch. The dorsal ribbing part from an old Airfix
“Space:1999”Eagle was added over these vertical wires to disguise them.


With the interior sprayed
with grey primer, the colour it would remain on the final model, it was time to
wire up the lights to the batteries and switches and to join the two halves of
the structure together. This was achieved with more epoxy glue, dowelling and a
few additional metal angle brackets.


I located a display base for
an aircraft diorama and proceeded to cut out the rectangular centre with my
Dremel. Using more girders from the Pontoon kit, I added them to the underside
edges, around all four sides. Eleven of the twelve footpads from the Pylons kit
were placed around three sides of the platform to add extra detail.
With the two faces securely glued together, it was now time to begin adding the styrene sides to the structure. This was accomplished with epoxy glue and held in place with masking tape during the drying process.


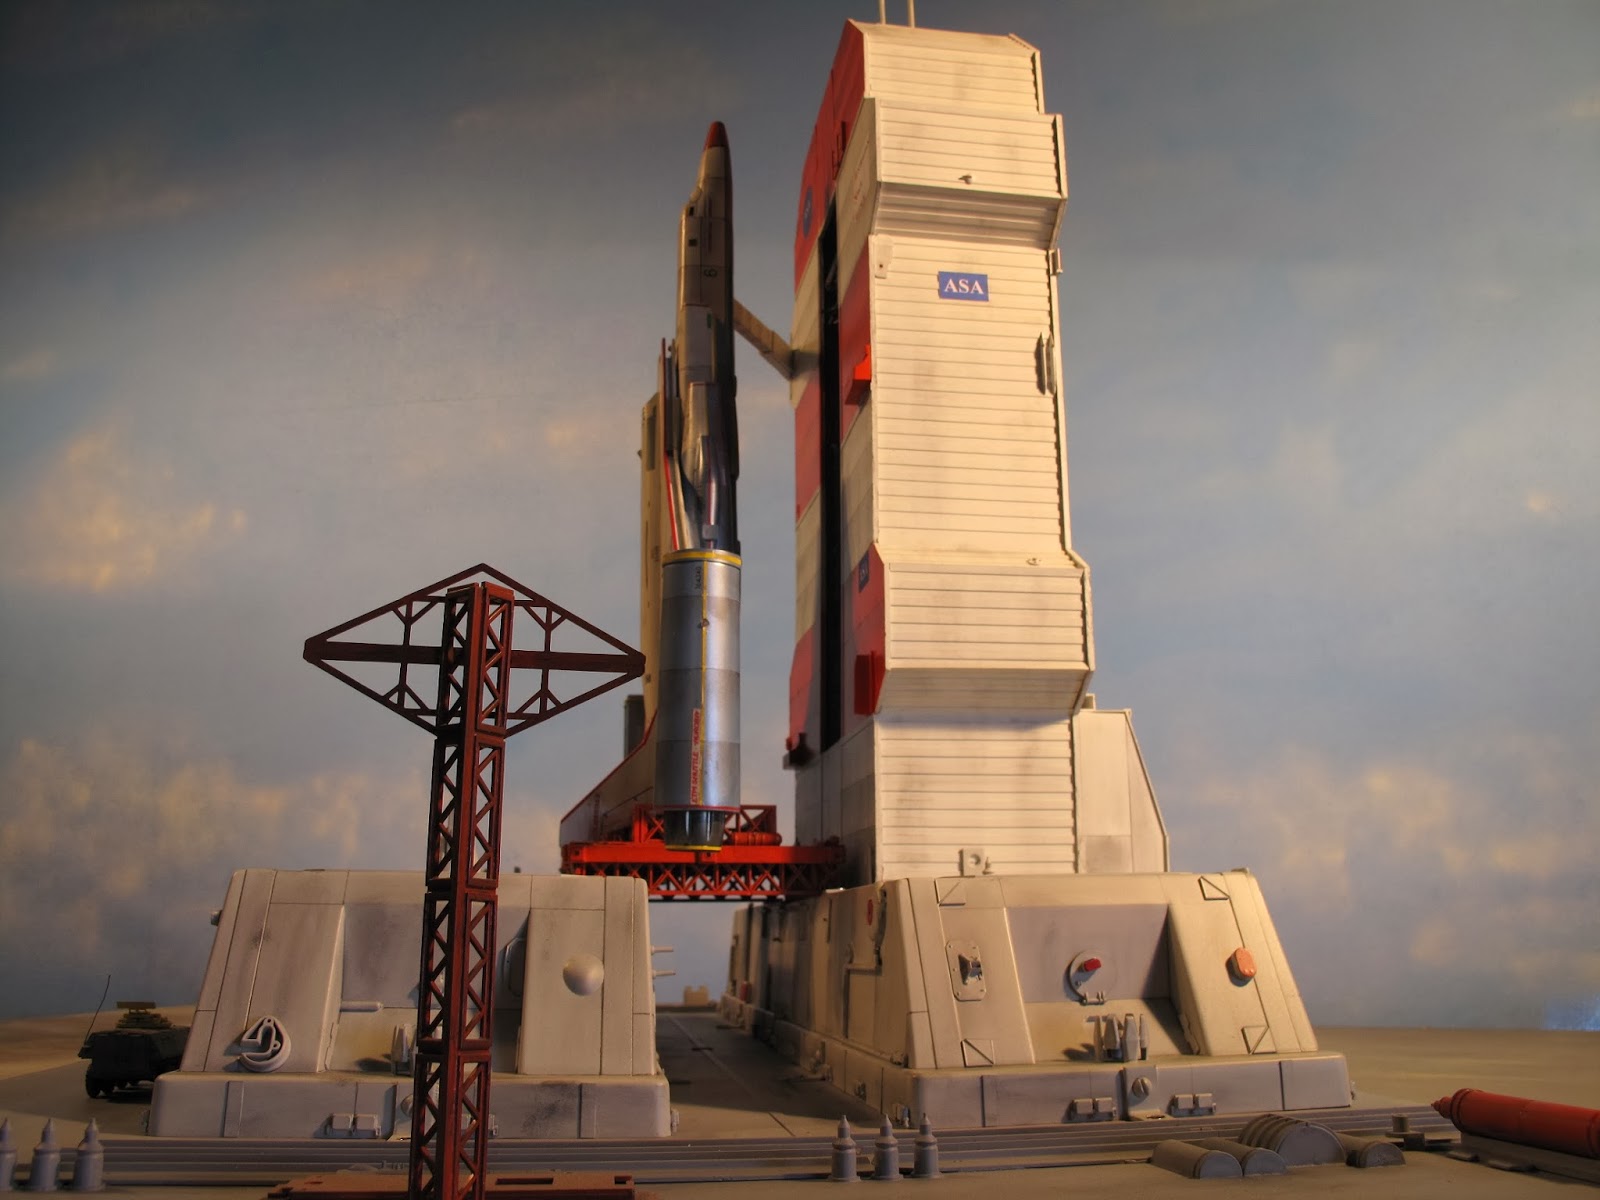
Thursday 28 November 2013
Due to work commitments over the past few weeks, this is the first time I've been able to post some more pics of the LAB. At the moment it is painted in the white base coat, awaiting detailing and weathering. I'm very happy with it so far, especially with the large size and it should photograph quite well whenever I get the time to do some shooting! Enjoy the latest pics!


The styrene box arrangement was created to add detail to the rear of the LAB, but will not feature in the next video production. It is solely for displaying the entire assembly at next year's local ModelComp 2014. It hides the switches for the lights of the LAB and I also added some plastic "bits and pieces" for extra detailing.


The five and one quarter inch computer diskette boxes that form the base of the launch area, four of them in all, were detailed with sprue, kit parts and styrene sheet. Once painted, they should look the part. The crew/passenger gangway leading to the Aurora Shuttle were constructed from Evergreen square tubing and more sheet styrene. Detail consists of kit parts like 1/35 scale tank treads and such.


Tuesday 24 December 2013
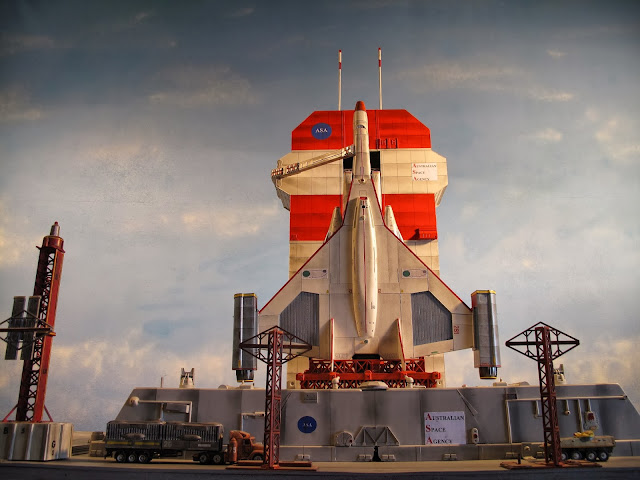
Well, it’s finally finished! After about 6 gruelling months
the Aurora Earth-to-Moon Shuttle and the Launch Assembly Building and
surrounding pad are completely done and ready to be filmed within the next year
or so – when I get around to doing it of course!
All looks good and I’m very happy with the final result. The
LAB features interior LED strip lighting, purchased from a local electronics
shop, as well as flashing red beacons on top of the masts. The launch area was
constructed from four, computer diskette boxes and detailed with sheet styrene
and various kit and toy parts. It’s attached to the plywood base with a number
of stainless steel angle brackets, as is the LAB itself, which won’t be too
apparent in the film. This allows me to remove the structures when I’m rigging
the Aurora model to ‘launch’ and to redrill the hole in the centre for smoke
effects to be pumped through. The brackets also let me take the entire assembly
apart for transportation purposes, something that was desperately needed with
some previous creations.
The completed dimensions are as follows: Base - 600mm x 1200mm, Total Height to beacons - 900mm, Launch Base - 800mm x 450mm, LAB - 400mm wide x 620mm high 9minus beacons).
I just took this series of photos yesterday, against my sky
cyclorama and this is how it will appear in the final film, hopefully. What’s
next, you ask? Perhaps the large scale lunar lander model that needs to be
built to transport the little girl to the Moon. But, at the moment, I’m taking
a well-earned rest for a few weeks to get over the ‘Silly Season’ and to spend
a few days totally cleaning out and revising my work shed. Should be fun!
To all the model makers out there, have a great 2013
Christmas and New Year and keep on modelling!


I just saw your segment on the ABC, your models are great :)
ReplyDeleteLovely design !!!
ReplyDeleteCableMod 60cm LED Strip in UAE, Addressable LED Strip in UAE, 60cm LED Strip in UAE
ReplyDeletehttps://gccgamers.com/cablemod.html
CableMod 60cm LED Strip in UAE, Safe Shopping Multiple Payment Options Express Delivery GCC Gamers Moneyback Guarantee.
1635221671729-7
CableMod 60cm LED Strip in UAE, Addressable LED Strip in UAE, 60cm LED Strip in UAE
ReplyDeletehttps://gccgamers.com/cablemod.html
CableMod 60cm LED Strip in UAE, Safe Shopping Multiple Payment Options Express Delivery GCC Gamers Moneyback Guarantee.
1635222756921-8