VIDEOLOG
A DAY BY DAY DIARY OF THE FILMING OF "DOGFIGHT!"
This so-called "VLOG" for my blog is an account of the filming of my latest, no-budget epic motion picture called, "Dogfight!" Filled with personal annecdotes and colourful photographs, it is destined to become a classic read for all aspiring film-makers and would-be directors of miniatures and special effect scenes. In fact, that's all it has in it, just models - no people, no ego-generated tantrums, no hungover technicians and gaffers, and absolutely no worth at all - except to those of us who love a good special effects sequence and who can see the merit in a model or two.
Finally, after two long years of pre-production, storyboarding and building everything from a skateboard-wheeled dolly to a 6 metre long sky background, comes the next entry from GM Productions - "Dogfight!", an epic aerial battle between the airforce's newest and best flying machine and three enemy interceptors from an unnamed country, competing for total air supremacy above Base Wildfire, a secret installation in the heart of "the land down under".
These videolog entries will be updated as often as possible and will form the basis of a full overview of the production process.
Read on, dear Gerry Anderson/Derek Meddings fans...
Monday 1 October 2012 – Set up for opening shot of film, Gareth and Brittany, one of my neighbours and his daughter, came over to help for few hours. Gareth pulled Search and Rescue Vehicle model (cameo from “Avalanche!”) while I panned down from sky and zoomed in to Base Wildfire sign. Shot at 25fps. Next, set up for two tracking shots of Base Wildfire. They will be joined together in a dissolve. Camera vibration too much on dolly, so had to lay down sheets of 3mm MDF to smooth out movements. Used both model stages for depth. Brittany helped by keeping cables out of the way of tracking shot on the homemade dolly and dressed the set with cars and small buildings. After many takes, finally managed to achieve two decent tracking shots of various buildings and vehicles. Shot at 100fps.


Tuesday 2 October 2012 – On my own today. Set up large scale buildings in foreground and used invisible thread to pull various vehicles across the set between the buildings. Shot at 100fps and looked quite good. Need to buy more halogen light stands as shooting at 100fps requires much more light than I have now. Tried wiring up the fan in MFR model to blow dust as it was pulled along, but deemed too difficult. Will get it to work one day! Multi-Building worked beautifully as it has four different faces and can be reused a few times and not be recognised.


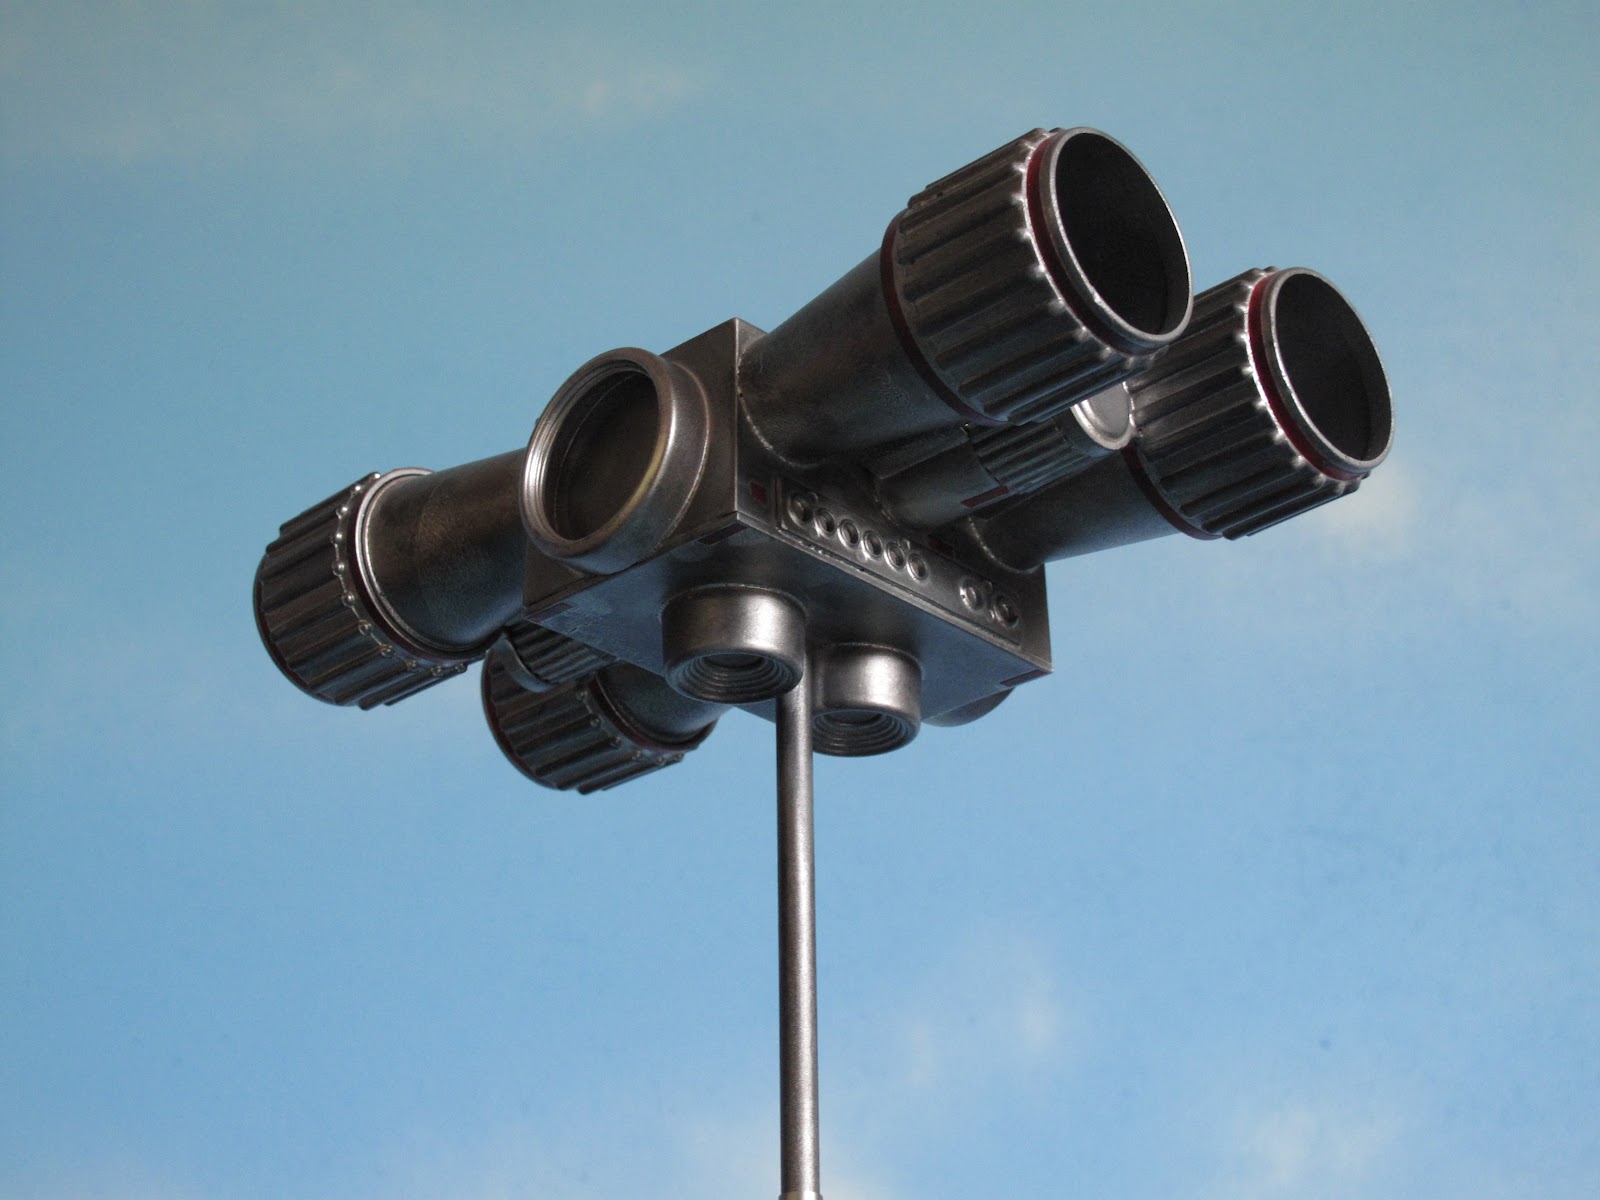
Wednesday 3 October 2012 – On my own again today. Did two insert shots of flashing warning sign. Tried wiring in bright LED, however illumination was too centralised with annoying hotspot in middle. Went back to using the torch behind the sign. Seemed to work fine. Varied the angles and distances for the shots. Put more light on sky background than on sign. Flashing light registered more in darker areas of the set. Shot at 100fps. Also took number of 25fps shots of PA system against sky from low angle. Sirens and voice-overs added later.

Thursday 4 October 2012 – Finished off the other flashing sign shots at 100fps and then began setting up for reveal of Bluefire 4 launch area. Had to remove sections of hangar doors and edging to allow doors to open smoothly when pulled from underneath. Took a long time! Section balanced between the two model stages. May have to put screws in to hold it in place. Not sure how to get overhead shot of red hangar doors as camera quite far away. Use a ladder? Or maybe stand on the welded steel table in foreground? Added fencing, crates and plastic panels to edge of 12mm MDF sheet that forms the launch area to disguise what could be seen by camera. Baseboard is painted in light grey not primer grey as in rest of model set. Will leave it this colour as it stands out against the darker grey. Trimmed Bluefire 4 launch bay doors to let them slide more freely. Dressed set with vehicles. May add few signs and flashing lights to provide more interesting details. Stuck “Danger” signs to three, small flashing light units I got from the Queensland Mining Expo months ago. They look good, however hard to see them when shooting at 100fps.


Friday 5 October 2012 – Went and bought another tripod of work lights. They add much more light to the model setup. Cost me $45, along with three extra 500W halogen bulbs at $4 each. Filmed one or two pickup shots of launch area, along with a pan of the set to add to the two tracking shots previously done. These will all be dissolved together to give the impression that Base Wildfire is a huge place, hopefully. Unable to get anyone to help out today – all the model club guys were either at work or busy. Couldn’t get any neighbours either. Need to shoot a couple of scenes of busy traffic around the launch area and require many hands to make it all work. Contemplated shooting it in stop motion animation, but not sure how to incorporate the single frame shots into Pinnacle, my editing program.


Saturday 6 October 2012 – Managed to trip over an extension cord and bring my new tripod lights crashing to the concrete floor. Bugger! Two bulbs written off and one face plate hinge damaged, but swivelling still works okay. Replaced bulbs and the lights tested out alright. Whew! Still couldn’t get anyone else to help out – all busy. Had the day off and worked on my blog instead. Took some still shots of the model setup to illustrate my Forced Perspective Model Photography article, No.40, for the blog. The tripod lights seem to cast a yellowish tinge to the model set. Doesn’t seem too bad though – gives it a daylight look. Finished off the new blog entry at 11pm that night. E-mailed Daniel Battley from ABC Tropical North TV earlier on in the day. He wants to assist me with the movie and is chock full of computer and film editing knowledge, as well as being a Special Effects fan, but he had family commitments and couldn’t help out over the weekend. No shooting done at all.
Sunday 7 October 2012 – Ready and rearing to go on the filming, but no helpers again today. Seems everyone was either working, at home with family or watching the Bathurst car race. Yawn! Couldn't get up much enthusiasm myself today. Decided to put this Videolog up on my blog. Got work all this coming week teaching Preps at Marian State School, so no filming at all for next five days until the following weekend when I hope to get a few helpers. Model set still looks damn good in the shed. Very happy with the way the background horizon and sloping hills look in-camera, although, to be honest, you can hardly see them at all, but they manage to give the overall impression of distance. Can't wait to continue getting some good footage for the movie, as what I've seen so far looks like it could have come straight out of "Thunderbirds", "Captain Scarlet" or "Joe 90"! Just what I've been trying to do!
Just got my better looking half to take a few behind-the-scenes shots for a bit of fun. Enjoy!


Just got my better looking half to take a few behind-the-scenes shots for a bit of fun. Enjoy!


Saturday 13 October 2012 - "Dan the Man" from ABC Tropical North arrived just after 9am and proceeded to educate me about computers and blogs. Head is still spinning! Spent all morning doing this stuff. Dan, my Technical and Computer Advisor, a new title I've just made up for him, is invaluable to the process! He is very patient with me! With Rob and Dan hidden under table, and Gareth on smoke machine, along with his daughter, Brittany on camera, we managed to achieve just 6 seconds of usable footage in six, long and gruelling hours. Got good shots of Bluefire 4 being revealed after opening of underground hangar doors, as well as two shots of it rising up ready to be launched. What a session! Two of the most difficult shots are in the can, thanks to the patience and hard work of friends. Truly a collaborative effort. Should be some good bits on the ABC website too, thanks to Dan. See: www.abc.net.au/open
(Search for "Plastic Stories" and please add some comments on the site!)
 |
| Rob (L) and Dan (R) take a break in the underground hangar. |
 |
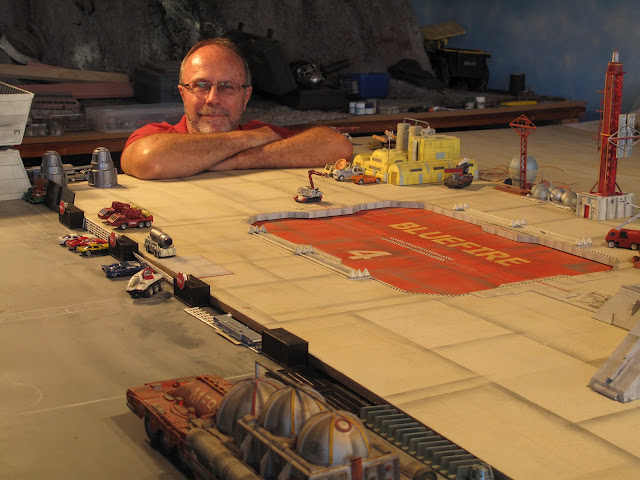
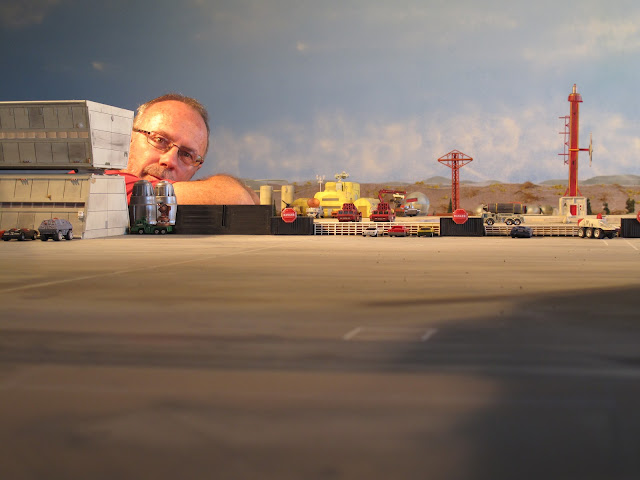
| Your illustrious Director hard at work. |
 |
| (Above & Below): The Bluefire 4 aircraft in its underground hangar before being elevated to stardom. |


 |
| Director of Photography, neighbour Brittany. |
 |
| My neighbour Gareth doing some model re-positioning. |
Thursday 25 October 2012 - Finally, after many fruitless days waiting for a few more hands to help out, success! Neighbour Barry and his friend from work, Colin arrived on doorstep. With three of us, managed to get good shots of Bluefire 4 elevating on launch ramp amid copious amounts of smoke. Colin had fun with that! Also got a few shots of trucks starting up and evacuating the launch area, as per storyboard. Smoke machine worked a treat and provided much needed atmosphere for ramp elevation, as well as for ignition of Bluefire 4's engines. Filmed from number of angles to achieve good coverage for editing later on. Used a pedestal fan to blow smoke in right direction. Hydraulics on launch ramp consisted of pair of aerials from a TV set ("Bunny Ears"). They worked far better than expected. Shot from two angles at 100fps. Also began editing some pre-takeoff sequences together. Including titles, etc. Bluefire 4 launches about six minutes into the film. It all looks quite good and very "Andersonesque". Laid a temporary soundtrack over the edited bits. I'm getting excited!
 |
| Neighbour Barry and his friend Colin check out the sizes of their tubing. |
 |
| Ducting the smoke under the set to the Bluefire 4 engines. |
 |
| Colin on smoke machine duties and Barry burning his hands under the launch ramp set. (Both guys had a ball!) |


Saturday 27 October 2012 – Well, it had to happen sometime. My laptop has died! After a good afternoon’s shooting takeoff sequences, it decided it would expire. In for repairs at the moment. Luckily all footage is still on video camera. Managed to get shots of Bluefire 4 taking off from launch platform amid smoke. Took me three hours to rig all the fishing line for this to occur. Went from launch platform, across half the shed and up to a tall ladder that was temporarily attached to a cross beam. Bit rickety, but worked out well. Rob and Gareth were invaluable in achieving the shots. Also got a few of the plane streaking through clouds against blue sky. Fishing line threaded through brass tubing on side of aircraft and extra length attached to nose led to counterweight which was dropped from height to pull the plane up the wires. Seemed to work quite well. All shot at 100fps, however did try some at normal 25 fps speed of rising through smoke against sky. Photos to follow later when I can get them downloaded from the camera and also reload Rob’s ones from his camera which are lost on the laptop somewhere. Funny, the same laptop failed exactly two years ago as well, during shooting/editing for “Avalanche!” Luckily it’s still under extended warranty, however data may be lost, but most is backed up on external hard drive. Damned 21st Century!
 |
Looks complicated and it is - just to launch an aircraft model!   |
Tuesday 30 October 2012 - Managed to find time to set up the two tables with "clouds" in order to shoot scene of Bluefire 4 breaking through cloud layer and into open sky. Used toy/pillow stuffing from local Spotlight for clouds - looks quite realistic through the lens. Needs smoke to really make the shot. Wanted to shoot the scene this afternoon, but no help forthcoming. Need three of us to film the scene - one on camera, one on smoke and the third on the model itself. Looks quite realistic through the camera. Picked up laptop - all is okay - corrupted logon ID or something? All data restored and safe - whew! Work tomorrow, so probably no shooting until Saturday.


Friday 2 November 2012 - Derek from the model club arrived early and we managed to get a shot of Bluefire 4 emerging from a cloudbank. Looks quite good through the camera. Shot at both 25fps and 100fps. Normal camera speed appears good enough for the shot.
Saturday 3 November 2012 - Turned aircraft around and shot number of scenes of it flying down into cloudbank. Wrong angle, ie. left to right instead of other way round, but may come in handy. Ross from model club was there four a number of hours to help out. He was on smoke and plane, I was on camera. Shot at both 25fps and 100fps. Put both tables together, end to end, for tracking shots. Ended up about six metres long. Covered with white cloth and polystyrene foam, then added clouds so grey model stage wouldn't show through. Took more than an hour to set it all up. Set up plane at one end on pair of parallel lines and pulled it through the shots. I stood on a ladder and filmed model flying across cloudscape while Ross added smoke and dragged plane along with third wire. Filmed at both speeds, however 25fps showed too much of the stage and background. 100fps was perfect for the shot and it actually turned out pretty well! Bluefire 4 just skims the tops of the clouds - something I had hoped to achieve. Repeated it a few times and then tried tracking shot on homemade dolly, following plane above clouds. Ross got his walking exercise during that time! Shots look really good, quite realistic and with very few support wires showing. Smoke in shots helps out a lot. The music will really make the beauty shots of Bluefire 4 that much better when added to this "freedom and grace in the sky" sequence. Maybe I can get the model to be a little more graceful and acrobatic?


Sunday 4 November 2012 - Set up model ready for panning shots as it flies over clouds, but unable to find extra hands to help out. Did some quick flybys with stationery camera shooting at one spot, but needed a pan of moving model and more smoke to bring the scene alive and provide interest.
Monday 5 November 2012 - No shooting done today. Model setup ready for panning shots of Bluefire 4 against clouds and sky. Ready to go! Continued editing the film in Pinnacle. With titles, etc. the aircraft launches at just over six minutes into the film. Have to record the voiceovers to add later. Wrote the script for them today. All sounds military and plausible. Got to find some siren/klaxon sound effects to put with the voiceovers to make it all appear more realistic and full of tension. Hopefully will get the panning shots done tomorrow and then change the cloud set around to film shots of both the enemy aircraft and Bluefire 4. Looking really good so far! Still have more closeups of Bluefire 4 to do, some with moving clouds beneath. Hope the model is large enough to withstand close camera scrutiny!
Tuesday 6 November 2012 - Downloaded some siren/klaxon sounds from soundguys.com, as well as some more explosion effects. All up, they cost about $50, which I thought was quite expensive. Came across Detonation Films, a small company that provides video clips of explosions, smoke effects and burning car and aircraft models for free downloads. Amazing what you can find on the Internet! Maybe a couple of their clips can be helpful. Neighbour Barry came over in afternoon and we shot furiously for half an hour and got sixteen takes of Bluefire 4 skimming over the clouds, from a variety of angles. Some very useful footage was taken. Edited it into film to add to the "freedom and grace in the sky" sequence. Just need some closeups of small model, as well as large scale wing section with moving clouds and smoke beneath to put into this section and then it's on to do battle with the enemy fighters! Dan over this afternoon to look at what I've got so far and maybe to record the voiceovers for editing. Trying to get first third of film completely edited before moving on to the rest of it.
Wednesday 7 November 2012 - Dentist visit at 11:45 today. What fun! Had some success before enduring dentist this morning. Set up large scale wing section G-clamped to a step ladder, used the remote for the camera and operated smoke machine, as well as sliding the wheeled table beneath the model to achieve a couple of decent shots! Talk about multi-tasking! Took shots of clouds travelling beneath wing section with added smoke for atmosphere. Most turned out pretty well and all on my own too! Quickly edited them into film before going to dentist. Still need some high angle shots of large scale section, as well as small model positioned above clouds, with moving cloudscape beneath. Will enlist some help for those ones.


Dan turned up this evening and we managed to record the voice-overs in just under an hour. Now to put them into Audacity and add effects for Dan's voice as Central Control and my own as Bluefire 4 pilot. Such a learning curve this computer stuff! Dan showed me what to do - let's hope I remember it all!
Thursday 8 November 2012 - Managed to get a couple of shots of the small Bluefire 4 model against the cloud background. Multi-tasked once again! Set smoke machine pouring, remotely operated camera and then slid table out from under model. Camera mounted above model on tripod captured just what I wanted it to see. Model mounted via a lead pencil stuck up its pipe and then G-clamped to a board which in turn is G-clamped to a ladder. Nothing but the very best in high-tech filming gear for this production house! The shots look great - the aircraft passing over the cloudscape at 100fps. Edited into the film, with music background, they look they actually belong with the rest of the sequence. Very happy so far. Unfortunately, I managed to knock over one of my tripod lights - yes, the very same one that took another beating from me a couple of weeks ago. Lost another bulb, but still seems to work okay.


Edited the voiceovers and sirens into film - made it look and sound so much better - first third is now fully completed and runs about 8:30 minutes. Few more flight shots to do and then it's on to the battle between Bluefire 4 and the three enemy interceptors. Still haven't finished my rolling sky - need it to achieve quite a few shots of speeding aircraft.
Saturday 6 November 2012 - Friend Wayne from model club arrived early in the morning and we achieved quite a few shots. First one was enemy aircraft large scale section in foreground with small Bluefire 4 plane in background against moving clouds. Panned from small aircraft to large scale section to show enemy following Bluefire 4 before engaging in battle. Worked pretty well. G-clamps are a positive boon!


Rigged new setup for getting shots of Bluefire 4 flying over camera - took an hour! Stretched support lines from small holes in sky backing cyclorama, over camera and tied off on old broom, higher up on other side of the shed. Wayne pulled model along support wires. Some nice shots, but some scenes are a bit slow perhaps? May have to redo some of them, allowing model to slide down wires and across cloudscape.


Sunday 11 November 2012 - Attempted to film model sliding down support wires in variety of speeds, but too slow and way too wobbly. Re-attached support wires to top of shed gable, however model is too light to slide down the correct way. Edited one or two shots from yesterday into the film. Runs just on eight minutes and has taken nearly six weeks to get this far! But, boy, does it look good!
Monday 12 November 2012 - Finally got into completing the rolling sky today! Cut out large, rectangular piece of calico and had good friend Helen sew it together for me. By some strange stroke of luck, the thing actually fitted perfectly onto the rollers and frame constructed months ago. More than that, it really turns and works exactly as I'd hoped! Should provide many shots of the models and large scale sections hanging or supported in front of it, seemingly flying at speed through the frame. I'm overjoyed! Now all I have to do is to spray paint it, add some clouds and I'm ready to film!
 |
| Basic wooden frame screwed together, with newspaper cores as rollers. Measures about 2.5m long by 800mm tall. A trailer jockey wheel handle turns one roller. Ray Kimpton from our local model club lent assistance with construction.  
Wednesday 14 November 2012 - Sprayed the rolling sky calico with grey primer. Have to borrow a spray compressor to add the sky blue coats. After doing clouds with a white spray can, it's ready to film on. Just need someone to keep turning that handle!
Cut out plan photos of enemy fighter to use in overhead shot of all three above clouds. Only got one model, so have to show all three enemy fighter in shot somehow. Used an old door-sized piece of perspex acrylic and screwed wooden bracers to one side, along both long edges. Seemed to be supported okay. Not too much pressure put on it though. Balanced it between two ladders with clouds on table beneath. Placed cutout photos on top and hope to get some shots as soon as help becomes available. Need to have table pulled through the shot while smoke machine is operating and the camera is precariously filming from directly above the photos. Not enough hands for all that!
  
Friday 16 November 2012 - Friend Derek from model club arrived and we managed to get the overhead shot of three enemy interceptors with clouds passing beneath. Derek was on table duties and I did smoke and hung out from top of ladder to capture the three photo cutouts positioned on perspex. Shot at 100fps and turned out fine. Lined up both cloud tables end to end and tried accomplishing POV shot of passing through clouds towards open sky. Too much shaky movement. Will try it again later with some sort of camera bracing to steady the shot somewhat. We then mounted three profiles of the enemy fighters on the vertically positioned perspex and got one or two shots of them moving right to left in front of the large sky cyclorama. Derek on table pushing once again.
Saturday 17 November 2012 - Borrowed compressor and spray gun to paint rolling sky first up this morning. Paint went on well, however it caused the calico to sag in places along the top edges which was heartbreaking. Still turns well and hope to get some shots in the morning of three enemy interceptor photo cutouts mounted on vertical perspex sheet. Just have to be careful to position rolling sky far enough at the back of the shot so as not to show up the roughness of the sprayed surface. Some drifting smoke should help out.
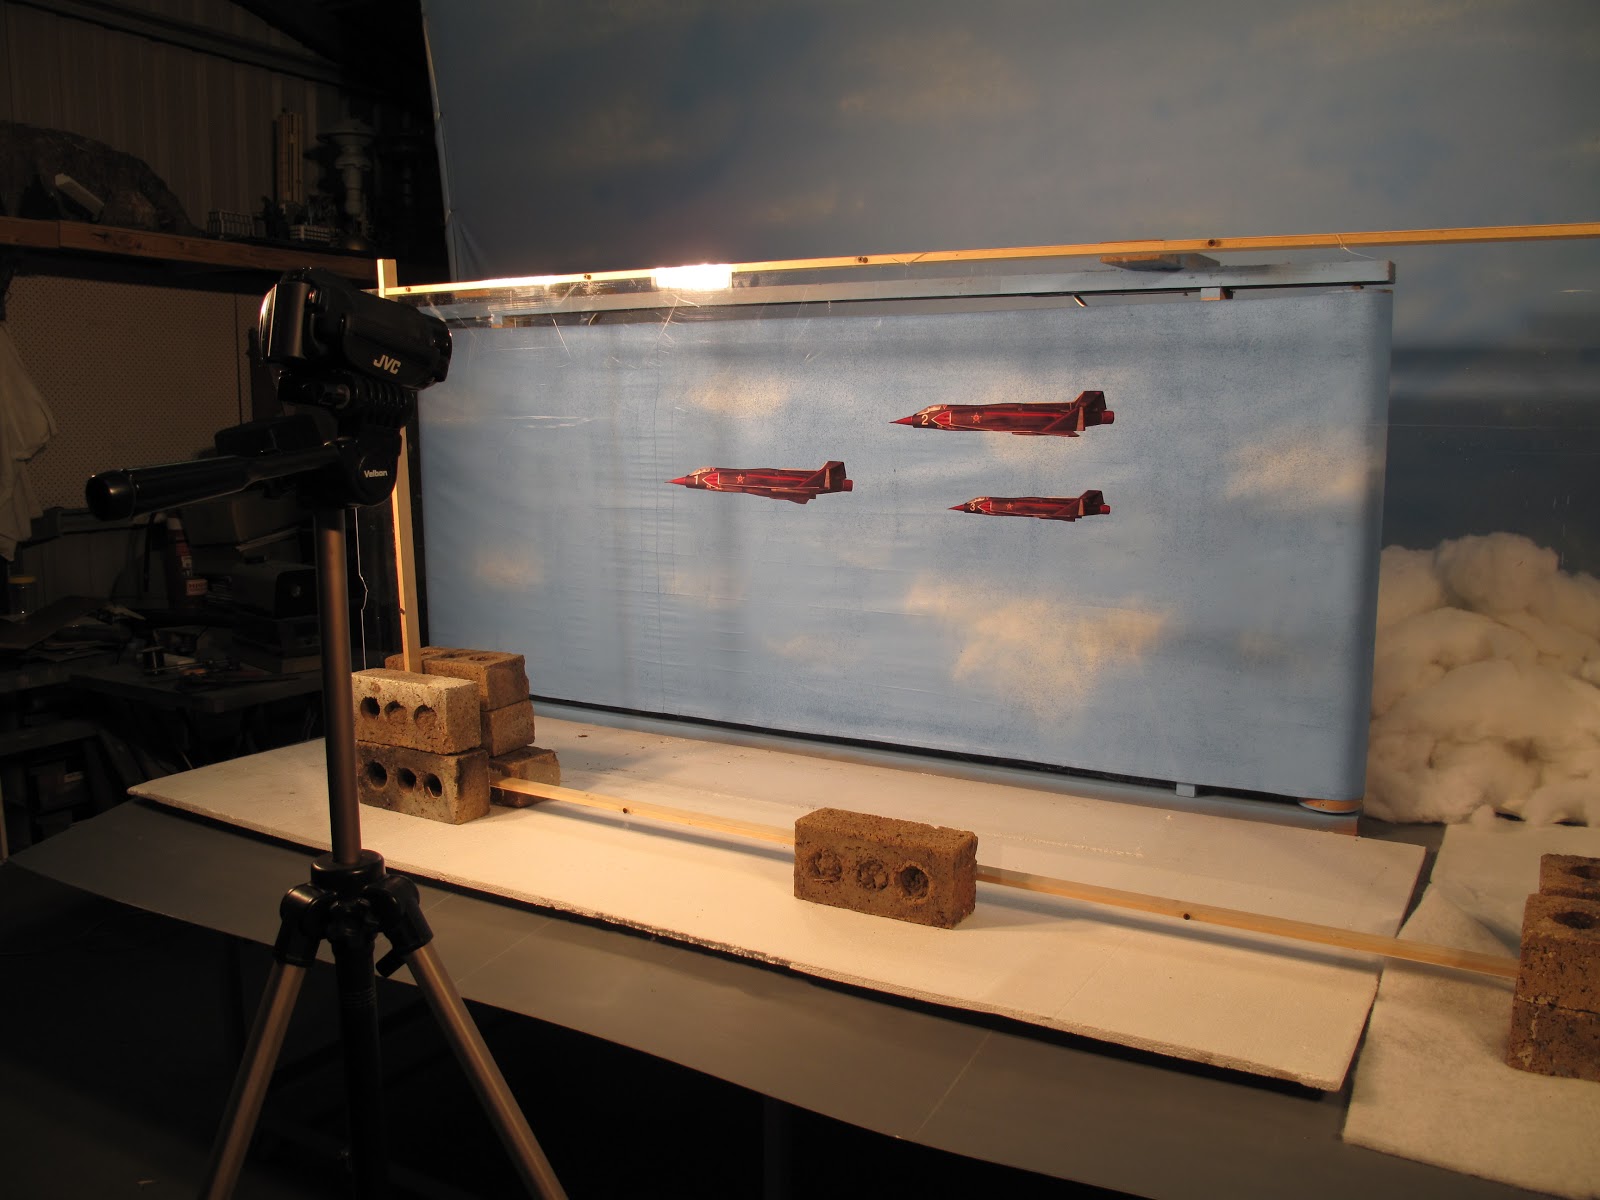    
Sunday 18 November 2012 - Tried filming some scenes on my own. No help forthcoming today. Not happy with rolling sky as surface is too rough from paint and it shows clearly in closeups. Sagging from the top too. Moves fine on rollers, but have to keep it as far in background as possible so faults don't show up. Lots of smoke in shots help to disguise these flaws. Will have to sand surface down and repaint it a few more times to get a smoother surface. When it is used in shots, screened with smoke and lit carefully, it provides quite a reasonably good background but, just as I had suspected, the area is way too small, especially for larger scale props and models.
Managed to get a couple of good shots after much experimentation. Needed extra hands to help operate everything - just can't fly the plane, pump smoke around, turn on camera and wind the rolling sky - all at the same time. Have to arrange for more people to help out.
Tuesday 20 November 2012 - Finally got someone else to help out! Rob from the model club arrived around 8:30 and we proceeded to obtain lots of shots against the rolling sky. Rob used cordless drill to wind the sky quickly and it worked fine. Needed to be pulled back up after each take as it tended to slip down, however some good shots achieved with cutouts and model of enemy interceptor. Strung up Bluefire 4 model on fishing line between two ladders and filmed quite a few scenes of it against rolling sky. Unfortunately the support lines showed up way too much so will have to re-do them, perhaps using invisible thread instead of the fishing line. Sky and smoke looked fine. So much easier with that extra pair of hands. Rob promised to come back again later this week to continue shooting.
   |
 |
| Filming scenes using the camera clamped to a tripod and riding on my dolly to achieve POV shots moving through the clouds. |

 |
| Puppeteering the Bluefire 4 model for banking and turning shots. |
Thursday 22 November 2012 - Managed to get neighbour Barry to drop over after work and we achieved a couple of shots in half an hour that had been bugging me for a while, including Bluefire 4 streaking up through the clouds and levelling out after launch. Edited these quick cuts into the film, added some sound effects and fine-tuned the music cues. Runs at just on nine and a half minutes so far. More rolling sky shots with both model aircraft and large scale wing sections to film before adding them in to the film. Barry promised to make it over tomorrow to continue getting these motion shots. Once all these bits are filmed, I can move on to the difficult ones with explosions, wings on fire and crashing aircraft models - fun, but potentially dangerous!
Saturday 24 November 2012 - Rob from model club came over and we spent next few hours filming large scale wing sections of the two opposing aircraft. Got many shots of wings against rolling sky and in different directions for cutting into the film. For explosions near to each aircraft I employed high-tech methods - flashing a stick with burning rag attached close to large scale sections and the smaller models.. Don't know if it was successful - will all depend on the editing when I use quick cuts and sound effects to enhance the look. Rolling sky is becoming looser and more stretched after each take - will have to repair it when finished. Got many shots of large scale wing sections shooting at each other. Tried to using can of fly spray to show firing of cannons but only worked on Bluefire 4 section. Had to use can of compressed air turned upside down to show firing of enemy aircraft cannons. Took a long time to set up and light correctly so the spray would show up enough.
Mounted large scale enemy wing section between saw horse and ladder, dug small pit in balsa wood and filled it with match heads and sparkler compound. Covered it with masking tape and resprayed with original Strato Grey colour. used a sparkler section as a wick and filmed at 100fps. Wanted to get shot of a hit on enemy wing section and it worked perfectly! Looked great! Set wing section alight with petrol and kerosene, blew with a fan and filmed at 100fps to show stricken enemy aircraft streaking down through the sky in closeup. Have to match this with smaller model trailing smoke at a later stage. Rob was on rolling sky. Fan not really strong enough to show wind rushing past, but fairly successful. Almost totally destroyed the wing section! Have to repair a little, repaint and shoot from opposite direction to show other enemy aircraft falling through the sky as well. All in all, a good day, with many shots achieved, thanks to Rob.


 |
| Setting up the large scale enemy aircraft wing section to show the cannons firing from different angles took a long time. Ended up using a can of compressed air held upside down. Duct taped flexible tubing from can and through hollow cannon. Worked well in quick bursts. Had to watch out for sprays of moisture. |
Sunday 25 November 2012 - Managed to get neighbour Gareth and his daughter Charlotte over to help re-do one or two scenes with large scale enemy aircraft section on fire. Then reversed the burnt and damaged section to film from another angle for a different scene. Certainly got my use out of this piece! Took me a few days to make cheaply and a couple of hours to totally destroy it. Constructed from old plywood, cardboard tube, balsa piece and bits of tubing, all mounted on tubular section of PVC pipe that I found lying around. Probably cost me about $20. Used old fire extinguisher to put out fires in between takes. Sprayed powder everywhere and made quite a mess!
 |
| Half burnt and covered in fire extinguisher powder, but still have shots of it to complete! Will post a photo of it after it's completely destroyed!  |
 |
| Neighbour Gareth helping to set up the enemy aircraft large scale section prior to setting it alight. The fans blow the smoke and flames in the right direction. |
Monday 26 November 2012 - Managed to get Ross from model club over for about four hours and we achieved quite a few shots. Filmed enemy interceptor model, in opposite direction from yesterday, for scenes of Fighter #1 diving towards the ground in flames. Mounted it on aluminium tubing pushed into tailpipe and suspended flaming cloth in front of it to make it appear to be on fire. Not as successful as having the cloth mounted behind the model. All shots filmed at 100fps to slow down the appearance and movement of the flames.
 |
| Model mounted on rod as is the kerosene-soaked cloth just in front of it. Not very successful. |
Ross is on rolling sky duties.

 |
| From the right angle, flaming cloth should align with model in near background to make it appear that the model itself is on fire. Camera tilted to achieve the diving angle. |
Went on to film some shots of the small scale pilot from Fighter #1 floating down on his escape parachute. Tried catching him in fall using 100fps, but ended up using 250fps as he was travelling way too fast. Ross dropped him from top of step ladder. Shot many, many takes to get just three decent shots of him descending properly.


Went on to re-shoot two scenes of Bluefire 4 banking and turning to attack enemy interceptors, filmed this time at 100fps. Looks much better this way, more smooth and graceful. Also re-shot one scene of enemy interceptor turning and climbing up over camera, far easier with two people doing the shooting. Ross operated camera and smoke and I could concentrate on how the model should move in the frame. All-in-all, a good day, with many shots accomplished, thanks to Ross's help.

 |
| As promised, this is all that remains of the large scale enemy interceptor wing and body section. Made over a year ago, it cost about $20 and more than served its purpose. Took a week to construct and an hour or so to totally destroy! May get one more shot out of it yet! |
Tuesday 27 November 2012 - Neighbour Gareth arrived and we spent nearly one and a half hours setting up for a shot of an enemy interceptor diving through the clouds. Had to use a ladder at one end of the shed to suspend the model and let it slide down fishing line towards the cloud tables. By this time neighbour Barry was here and he used a fishing rod to attach to the model which was now strung up in reverse so we get a shot of it erupting from the clouds and climbing into the sky. Worked quite well, especially when the pitot tube of the model, a large nail, became embedded in the support timber at the top of the ladder. Caused quite a gale of laughter!
 |
| The enemy interceptor model firmly embedded into a timber support high above the floor. Neighbour Barry used way too much strength with the fishing rod in pulling it up the support lines! |
 |
| Barry having some fun sculpting cloud shapes in between takes. Yes, we managed to have some amusement too! |
 |
| Neighbour Barry on fishing rod and myself on camera awaiting the enemy interceptor to climb swiftly up through the clouds. |
Except for some wobbling of the model, the technique worked quite well. Unfortunately, as the model slid down the lines, the camera's white balance was off and ruined the shot. As well as that, the support lines melted from the flames during the next take and the model crashed to the concrete floor, knocking the nose cone completely off and causing other minor damage.
 |
| The model is released by Barry and slides down the lines and through the clouds. |
 |
| Neighbours Gareth and Barry rigging the model for its plunge down the support lines through the clouds and between the tables, to land softly on some padding, necessary if we want to do re-takes.
Thursday 29 November 2012 - Achieved a couple of the most important shots in the entire film today - Enemy Interceptor #2 crashing into the ground and the resulting explosion and fire! Ross from model club arrived at 8:30 and we proceeded to get the model ready to slide down the support lines, on fire, and through the cloud layer. Used a kerosene-soaked rag tied to wire projecting from starboard side of the model. Neighbour Barry joined us and we did the shot beautifully. Cleared all the cloud layer away and laid tarpauline over both tables after firstly putting some bricks, pieces of timber and bits of styrofoam on the base to act as hills in the landscape. Added a few wheelbarrows of dirt to the top surface of the foreground table and fine, sifted soil to the rear table to force the perspective. Planted a few trees as well - larger in the foreground and smaller in the background. Model aircraft came sliding down the support lines and disappeared behind a foreground hill.

Ross and Barry set up the model for its slide down the support lines
Used a small tin of gunpowder to create the flash of the explosion, filmed at 250fps and then set up some petrol-soaked rags to make the resulting fire after the plane had hit. Also filmed at 250fps. Flames looked really large and fierce in slow motion.

Friday 30 November 2012 - Derek from model club arrived and helped to set up for the final shots needed for the film - that of Enemy Interceptor #1 diving down in flames and meeting an ignoble end at the base of a cliff. used the fine, sifted soil for the background, as well as rolling hills and horizon, positioned alongside the cliff face at right angles. Strung up the support lines, from the top of tall ladder at other end of the shed, down to the base of the cliff and tried model sliding down them - way too slow. Had to restring the lines at a steeper angle to get the necessary speed for the dive to be filmed at 100fps. All set up and ready to go. Should be able to film the scenes tomorrow. Would be ironic though - exactly two months (eight weeks) to the day that the very first scene was filmed! Nearly finished!!!
  
Saturday 1 December 2012 - Well, thanks to Ross, this was the very last day of shooting! Yes folks, it has taken me exactly two months to the very day to shoot all the scenes I needed and now they're all done and "in the can" as it were. Ross very kindly came over and we got the scene of Enemy Interceptor #1 crashing into the base of the cliff in just two takes.
  
We then set up for the resulting explosion, having some trouble with the precise timing needed. Ended up with four ruined takes of the scene. Just couldn't get it right until at the end. Packed model pieces around the tin containing the gunpowder, set it off beautifully and filmed at 250fps. By a strange coincidence, the model bits came from a previous design I had done for the Bluefire 4 aircraft about fifteen years ago! Seemed fitting to destroy these bits!

Set up for the fire by soaking cloth in petrol and lighting it with long taper. A fire extinguisher was on hand.
After this, Ross helped me refilm a scene of the ejecting pilot that I hadn't been happy with for quite a while - thank you Ross!
Nearly finished all the editing of takes, adding sound effects and music, etc. It has been a lot of hard work, with sweat, tears and swearing but, in the end, a lot of good fun and enjoyment, especially when one sees the final result on screen and realises that it's one of your own models that looks so real. Overall, most scenes in the film look just the way I imagined them nearly two years ago when I drew up a set of rough storyboards and tried to have them tell a basic story. A few bits and pieces have turned out a little disappointing, however "Dogfight!" is a quantum jump in quality and effects techniques that were featured in my first short film, "Avalanche!" (For the next "little moofie", I promise to omit the explanation mark in the title!) Special thanks to the following people, in no particular order: Ross Moore, Robert Grinberg, Barry Wright, Gareth Thomas (and daughters Brittany and Charlotte), Daniel Battley, Derek Romans, Wayne Belzer, Adam Robins, Ray Kimpton and Colin Woodfall. Without these people's help and support, I wouldn't have been able to achieve what we did. Anyone interested in a DVD copy of "Dogfight!" please contact me via: |

P.S.
Sunday 9 December 2012 - Well, the movie has been edited, saved and burnt to disc, clocking in at about 16 minutes. With two added extras, a "Making of..." with behind-the-scenes video mostly taken by Rob Grinberg and a slideshow of the models, backgrounds and filming, the entire entertainment package comes to 33 minutes. Really happy with the way it has turned out. Thanks again to Dan Battley who spent hours turning some of the rough footage into something worthwhile and tweaking some bits I wasn't overly pleased with. I bought the cases, printed some DVD labels and case covers and assembled it today, along with some help from Michael, a good friend visiting from Brisbane. Needless to say, he received a free copy for his troubles! He seemed pleased!
If you get a copy of this DVD package, just think of all the hard work and dedication that some friends of mine and myself put into it - without them, the film wouldn't exist. Some feedback on what you think of it would be very much appreciated.
Wednesday 2 January 2013 - On the advice of a good friend of mine, Jim, I have totally re-edited the film down to about eight and a half minutes. In the film industry himself and having done a lot of professional models and Special Effects shooting, Jim suggested trimming the shots down to about half their length to create shorter and therefore more interesting sequences. I took his good advice to heart and am happy to say that the shorter version is far more exciting. It was heartbreaking to cut out a lot of shots because they had taken so long to set up and shoot, but Jim's advice was very sound. I've called the new version, "Dogfight! Redux" and am attempting upload it to YouTube soon.
Tuesday 8 January 2013 - Well, after much swearing and gnashing of teeth, "Dogfight! Redux" is finally on YouTube and out there for people to see. It took a while to organise and upload, but it's finally done. There are one or two very minor edits that probably need looking at, however I'm extremely happy with it and hope that you enjoy it as well. Please add some comments and suggestions and tell your friends all about it. The YouYube address is as follows:
http://youtube.com/watch?v=ZSQ1hZzeItA
Now, what to do for my next epic motion picture...?