ABN: 19 337 300 915
(Lance
was very professional and the service was swift and cost effective. I highly
recommend his business.)
Because soldering is not quite my forte, all wiring joins were accomplished by firmly joining the appropriate wires together and then covering the join area with short lengths of Heatshrink, available at any electronics shop. Wiring up the many LEDs was done in the same way, after first bending the positive and negative filaments and crimping the ends to the wires, after which they were treated with more of the Heatshrink. The power supply for each building was provided by a pair of 1.5V AA batteries connected to an on-off switch in the battery box itself. These invaluable little boxes were purchased at Jaycar Electronics. Any flashing LED beacons were wired into a different circuit from the window illumination LEDs, so some buildings have not one but two battery/switch boxes secreted within their construction.I used individual
flashing LEDs for the beacons, ones that blink on their own rather than being
connected to an IC chip to have them flash in unison. For window illumination I
used 3mm super bright LEDs purchased from LED Sales. They provided a clear,
bright light that was exactly what I needed.
One area of continuing
concern with my buildings was how much could be viewed through the windows with
the interior lighting I was installing. I didn’t want to have to detail each
construction with a full interior and, as yet, have no real answer to this
vexing problem. I “frosted” each of the window areas from the inside with
sandpaper so as to provide an even glow when the lights are switched on,
however I’m still rather unhappy with the way they look at times. When viewed
from a low angle, as most buildings are, no real details can be discerned.
However, one can see inside quite easily when viewed close up and I need to arrive
at an easy way to detail the interiors of these structures. A friend suggested
photographic cut-outs which I will attempt to do with the next building. (Any helpful comments will be greatly
appreciated.)
I won’t go into details of how each and
every building was constructed. Needless to say, the necessary LEDs were
installed very early on and the windows masked off, either with tape or Blu-Tac
to avoid getting paint on them during the spraying process. Once basic
construction was completed, each building was detailed with kit parts or found
objects. One thing I did notice on these buildings was something I call
“repeatability”. For an aircraft or vehicle, each piece or section is usually
different from all the others that go into making up the shape. With buildings
however, the opposite occurs, These constructions are usually modular in
nature, meaning that certain section shapes are re-used again and again. One
floor of a highrise is fairly certain to be virtually identical to the next
floor up and so on. To provide this “repeatability”, I scoured all my boxes of
bits and pieces, hunting for multiple copies of ideal shapes to detail my
buildings. One source of cheap multiple parts are those $2 shops that are a
boon to people like me. One Japanese franchise sold small, clear dipping dishes
in packs of ten for a couple of dollars, while another shop had plastic tracks
for toy trains that would be great (and repeatable) detail on the sides of
buildings. Another great find was a collection of clear plastic containers that
had housed teaspoons that collectors like to display on their refrigerators.
Where I managed to get thirty or forty of these from, one can only guess. I’ve
forgotten myself! Yet another source of detail consisted of various plastic
shapes used for the rolling up and display of materials and cottons in fabric
shops. It’s amazing what one can put on the side of a model building and get
away with it. I also located a box of old plastic photographic slides which I
utilised for Building #3. And no, I didn’t disguise them at all although, in
retrospect, I probably could have been a little more discerning with them. Cheap
shops can provide a wealth of detail parts for very little money. Just try to
avoid the bendy type of plastic
(polyethylene) that can be a nightmare to glue. Button containers, plastic
display racks, serving dishes, bowls – most items can be used in some way or
other.If the plastic was a little flexible, as
in the CD container atop the tower in Building #2, I found that by sanding the
areas needing adhesive, the glue worked far better.
All eight buildings were constructed,
windows and beacons were masked off, primed in good quality auto spray and then
given a final off-white colour called “Surfmist” which I purchased from my
local Bunnings store. Additional masking, followed by more spraying with extra
colours and each of the buildings was ready for the pencil lines, pinstriping tape and
final weathering with graphite rubbed on the straight edge of a piece of paper.
When all was dry, the masking was removed and additional kit parts were added
over the model to provide a little more interest to the surfaces, In this case,
I opted not even to paint the extra pieces, but to Superglue them on just as
they were to various nooks and crannies of the structures, after which a final
clear, matt coat of varnish was applied to seal everything together and to
fatten any glossy areas. Generally I found that, as I progressed through each
building, I would re-use various detailing parts that suited a particular
structure. Some parts found their way onto nearly all the structures. All
parts, with the exception of the Evergreen, were purchased or found in my extensive
collection and were as cheap as possible. In the end, I guess I had spent about
fifty dollars on the eight structures. Not too bad considering the multiple uses
I’ll manage to get from each of them.
Here is a basic list of materials used
in the construction of each building:
BUILDING #1: Basic shape is some sort of food display
unit, various levels of which swung out to provide access to the contents.
Cost: about $1. Details – lots of
Evergreen (I went overboard a little!); sheet styrene for door entrance;
plastic bowl, kit girders and aluminium cigar tube for flashing LED beacon
tower on top; kit parts.
 |
| Some kind of plastic food display/serving unit... |
|
|
|
|
|
|
|
|
|
|
|
|
|
|
|
|
|
|
|
|
|
|
|
|
|
|
|
|
 |
| ...becomes a tower. |
 |
| Constructing the entrance foyer. |
 |
| Creating the tower and beacon. |
 |
| The completed entrance with lighting. |
 |
| A lighting test on the tower. |
 |
| Adding some details to the top area. |
 |
| The beacon area completed. |
 |
| The fully completed tower in a more natural setting. |
BUILDING #2: Old Qantas plastic valuables tray used
at airport security; model kit truck body; CD container; butter dish lid; sheet
styrene; kit parts; DVD display rack shelves cut up; many plastic teaspoon
display containers.
 |
| An old plastic tray from Qantas security becomes... |
 |
| ...the basis for a building, along with the top from... |
|
|
 |
| ...a butter dish being detailed, along with... |
 |
| ...a truck body and CD container for a tower. |
 |
| Detailing the front entrance... |
 |
| ...and the rest with bits and pieces. |
 |
| The building look better when primed in grey. |
 |
| The basic colour scheme added. |
 |
| This shot shows that I need to add more LEDs to the interior to provide a higher illumination for the windows. |
BUILDING #3
– Four cassette display cases; sheet styrene; plastic Agfacolor slide mounts;
kit parts.
 |
| Positioning the four cassette display cases. |
 |
| Adding some styrene sheet to provide a front facade. |
 |
| Evergreen strip gives some detail to the window areas. |
 |
| Detailing the roof area with various offcuts. |
BUILDING #4
– Two display bases from Moebius 1:350 scale Enterprise kit; coloured paper;
pair of cassette display cases as underneath car parks; kit parts; plastic
teaspoon display containers; sheet styrene; old resin castings of Airfix bridge
kits.
 |
| Detailing the car park areas, originally a pair of cassette tape containers. |
 |
| The structure atop the car parks began life as a pair of Moebius Enterprise display bases. |
 |
| Detailing the underside of the building with teaspoon display cases. |
 |
| I added coloured paper to the recessed areas to provide some surface interest. |
BUILDING #5
– A freezer drawer from a refrigerator; parts from a CD display rack for the window
frames and rear details; a Continental Beef Stock Cube container for the
entrance lobby; styrene sheet; collectible teaspoon containers and 5.25 inch
computer diskette (remember these from 20
or 30 years ago?) dividers for roof detail; kit parts.
 |
| An old drawer from a refrigerator freezer becomes the basis for a building. |
 |
| The plastic rack from a CD display unit can become window frames. |
 |
| The window frames glued over masking tape covering the clear "windows". |
 |
| A stock cube container became the foyer of the entrance. |
 |
| The entranceway has a masked off door made from clear styrene. |
 |
| The roof area detailed with dividers from old computer discs, and plastic boxes. |
 |
| The LEDs positioned atop a plastic box attached to the underside of the roof. |
 |
| The finished building prior to painting. |


Building #6 - Plastic food container; rectangular acrylic aquarium; 60mm PVC pipe; clear plastic domes(2 different sizes) from Christmas ornaments; sheet styrene; front window areas are one side of a cheap($2) plastic container; collectible spoon containers; Evergreen strip #128; kit parts; tracks from toy cars for detailing the rear of the building.
 |
| The basic shapes for the building are played around with. |
|
|
|
|
|
 |
| Adding Evergreen strip to detail the window areas, one side from a plastic box. |
 |
| The areas either side of the central windows are built up using styrene sheet. |
 |
| Detailing the entranceway/lobby beneath the central window area. |
 |
| All detailed and tiny, none of which can be seen because I "frosted" the doorway! |
 |
| The half cylinder on top is a section of PVC pipe cut lengthways. |
 |
| Adding the window areas to the inside and outside of the plastic food container. |
 |
| The window areas on the rear are sections of toy car tracks. Other detail also added. |
 |
| Primed and ready. The masked off domes were finished, painted and weathered first. |
 |
| Adding the pinstriping tape, different colours, pencil lines and graphite weathering really finishes the building off. |
 |
| Whoops! Unable to correct this angle. |
Turning the buildings to face different
aspects in photographs should result in quite a variety of shots without
drawing too much attention to the buildings themselves. The car park areas of
Building #4 are detachable to provide a variety of photo situations. The long
building itself can be positioned on one end to give a different aspect of the
same structure. The dome atop Building #1 is similarly detachable to allow for
different photo possibilities. The rear details of Building #5 are different
from the details on the other three sides so as to give a variety of looks to
the structure in photographs. The windows on the rear of Building #6 are of a different scale to those on the front which, hopefully, can be utilised as two separate structures.
For the completed photos a single
tabletop was used in front of my sky background. A horizon cut-out was
placed at the rear and the structures were photographed in front of this, along
with some older buildings and structures in the far background. Various
vehicles and differently-scaled cars gave the impression of a much deeper
perspective. Chalk lines were drawn on the primer grey surface to simulate
those found in real life at airports and military bases. A length of railway
“grass” was positioned in front of the camera which was mounted on a tripod
near the sloping foreground. This foreground consisted of a long styrene sheet
stapled and screwed to the table edge. In all, about an hour was needed to
prepare the area for photography. The fun part came when the lighting was
lowered and the building illumination was switched on. Seeing the structures
fully lit made all the extra work just that more worthwhile.
(A
very special thanks to Dion and Ray for their help, advice and muscles on the
photographic set-ups.)
 |
| My good friend Dion Collins enjoying himself while playing with my toys! |
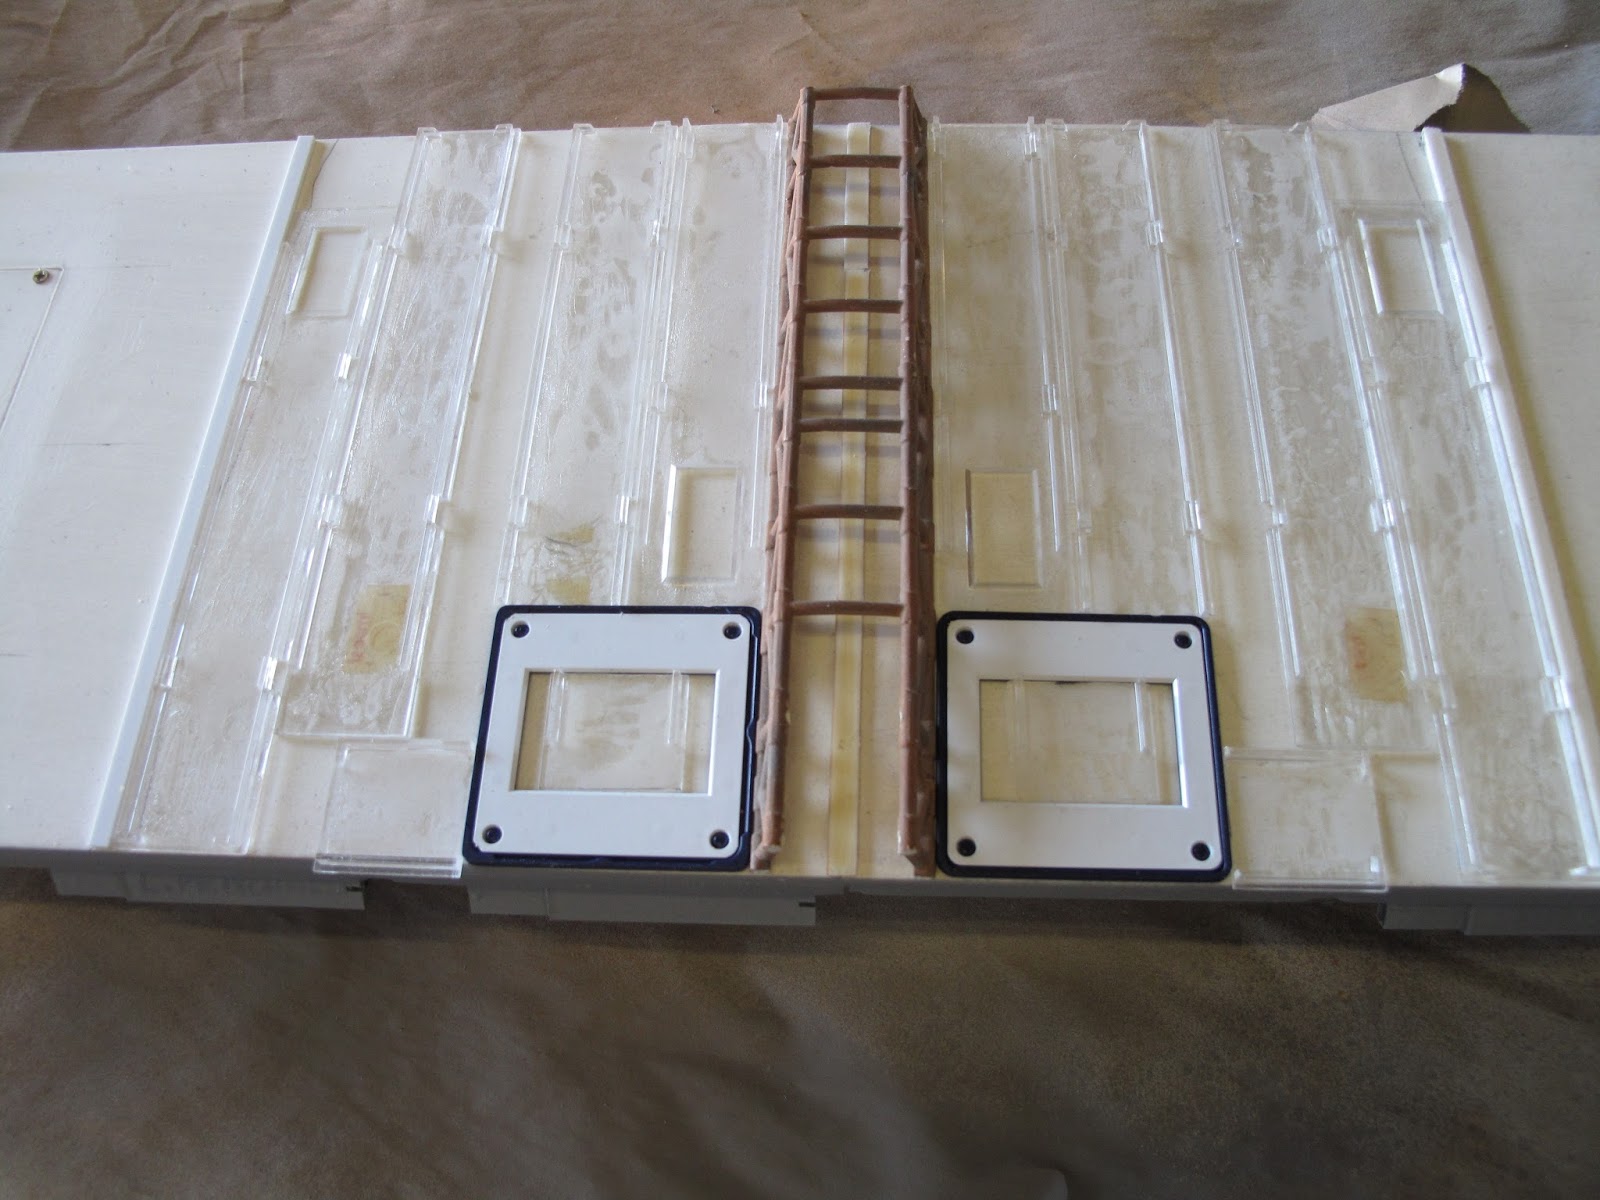
BUILDING #7 - The Terminal
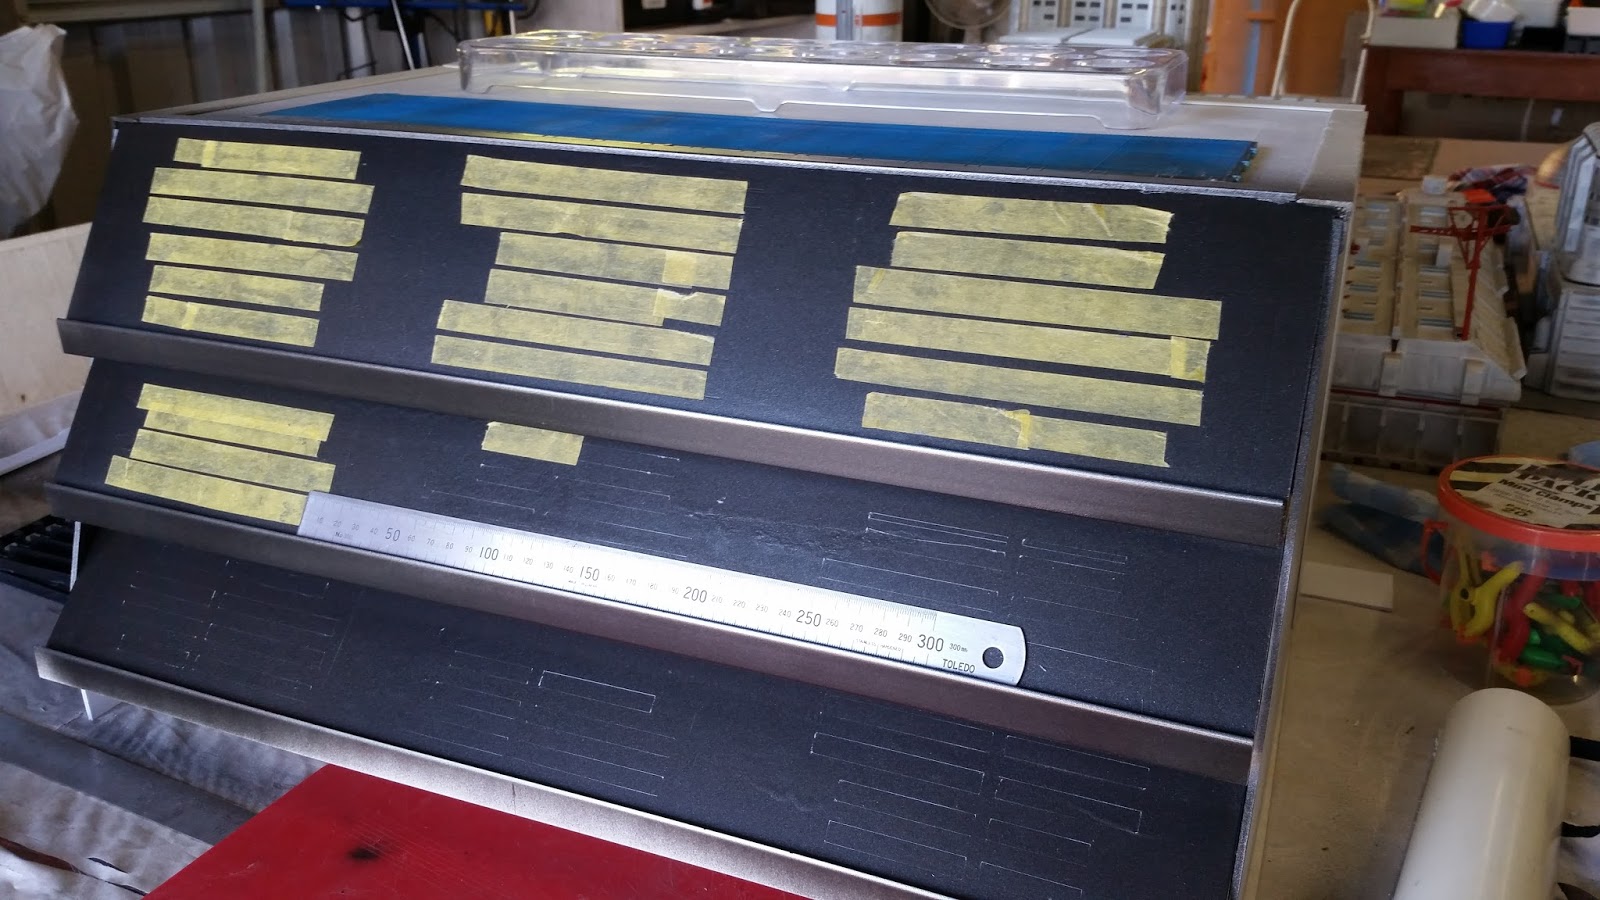
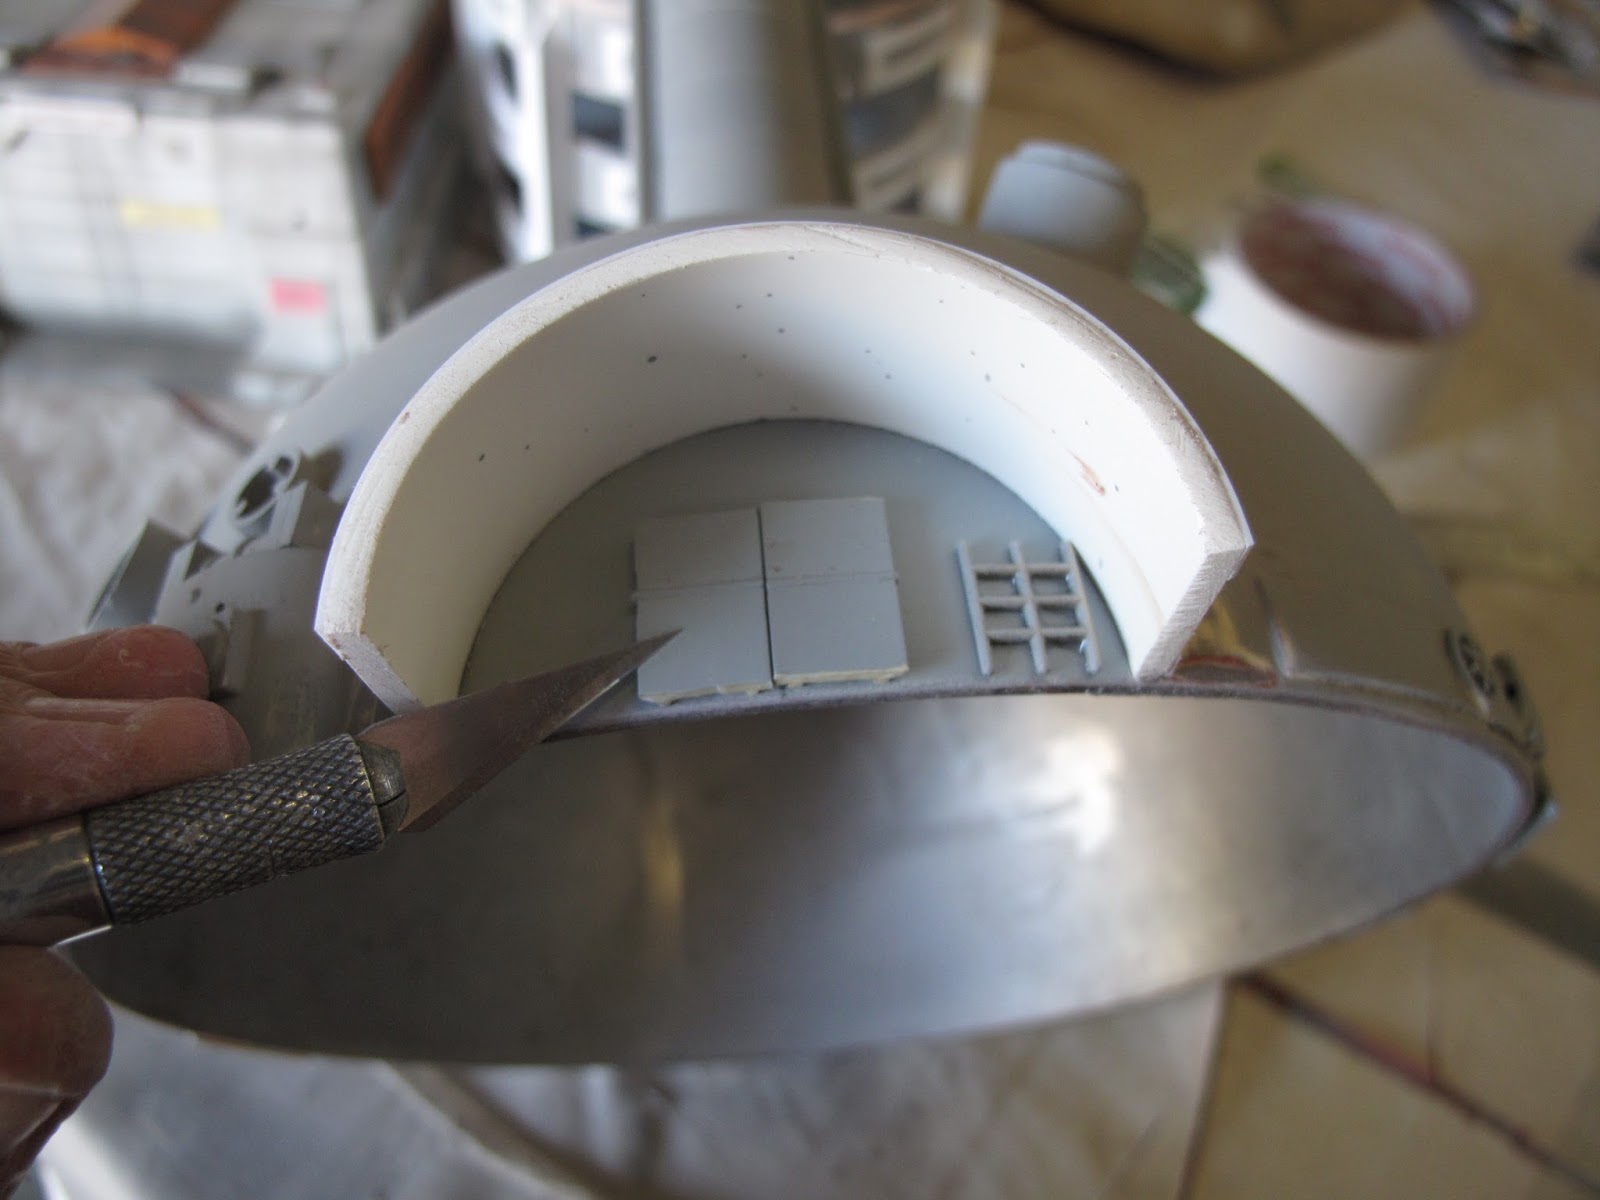
This structure was a little different as it was totally scratchbuilt as opposed to using a basic shape for the foundation. Wanting to emulate the shape of the terminal used in Captain Scarlet and other shows, pictured at the beginning of this article. I began with a polystyrene box that I managed to "borrow" from my local Coles supermarket. In fact, Coles was giving away a dozen or more of these fruit/vegetable boxes and since I had previously used one to create my "Multibuilding", I thought I could reuse the same basic shape and add to it to make the terminal. Sheets of Foamcore were purchased from my local Bunnings and these became the walls for the terminal. Scraps of MDF (Medium Density Fibreboard) were located and cut to the appropriate size using my bandsaw. They were glued to the polystyrene box and Foamcore sheets using Liquid Nails, a strong adhesive for the building industry. Various scraps of MDF became the bracing for the three levels. I found more of the DVD dividers that I had used for windows on Building #5. This saved a LOT of time on the window areas, one side of the building being covered in them. I spray painted the actual window recesses a dark grey so this colour would show when the masking was removed. There were no lights or beacons added to this structure. here is a list of materials used in its creation: Foamcore sheeting; MDF sheeting; kit parts; window frames from a DVD display unit; two photographic slide units; sides from a truck body; PVC pipe section; plastic rightangle from Bunnings. I made the back of the building completely different to the rest so as to be able to use this in different photographic setups.
 |
| Adding the masking tape to the window areas. |
 |
| The window frames are from a DVD display unit. |
 |
| Priming the building in grey pulls it all together. |
 |
| Details consist of a pair of space shuttle fuel tank halves and some PVC pipe. |


