PERIMETER DEFENCE VEHICLE
SOME TOYS WERE JUST MADE TO BE CONVERTED!


I just love some of today’s toys. No, not the seemingly endless Barbie
doll range, nor the noisy electronic games with their flashing,
vertigo-inducing graphics, but the unlimited number of vehicles – cars, trucks,
machinery, aircraft, etc. that is available for boys to play with. Most toys,
these days, are certainly unified in that they carry a little sticker or etched
tag – “Made in China”. Some are of very dubious quality, ie. flimsy plastic,
poor mouldings, limited lifespan and so forth. However, from time to time,
there comes a toy that is a grade above the usual – good quality plastic,
interesting concept and one can play with it for more than five minutes before
becoming bored. Above all, there is the potential to be converted into
something other than what it was originally created for. Such is the case with
the Heli-Mission RC Truck by Silverlit. I Googled the toy and was quite amazed
by what it could do. I wouldn’t mind playing with this toy at all!


Bought for just $3 at my local op shop, the truck was complete, however
no Radio Control unit or helicopter came with it. It had front steering and, after
putting batteries in, some flashing lights on top along with annoying sirens. The
detail was good and the plastic was of the styrene type – ie. I could glue to
it securely. The idea was to take the truck on a mission, lights and sirens
blazing, open the doors and fly the helicopter out from its hidden bay within
the truck. What a wonderful idea! But, I just had the truck, some flashing
lights and manual steering and door opening. What could I convert it to in just
a few days, in between other modelling assignments? (Yes, I do work on a number
of projects at one time.) The answer in this case was to begin adding details
to the outer hull while the idea of having a kind of cannon/gun arrangement
hidden within the body took shape. With the addition of some aircraft drop tank
halves and quite a few miscellaneous kit parts, the truck began to look even
more interesting. Knowing that I was going to spray it another colour, I had
already masked the six wheels which had soft rubber tyres and were in great
condition. I didn’t need to touch them, or the silver rims, at all.


For the cannon assembly I finally decided on, I cut a sheet of 2mm
styrene to fit inside the body of the truck and proceeded to detail it with cut
up tank parts to give it a busy look. I know I wanted the guns to rotate and
elevate, so I used the top from a 35th scale tank, where the turret
connects, as the basis for the rotating guns. After a bit of cutting and
sanding, I had a circular section of styrene that would fit right into the tank
part and lock into place, the same as if the original turret had been used. For
the gun elevation, I was lucky enough to locate another tank section that
possessed a pair of protruding lugs which could be fitted into triangular
styrene pieces to elevate and lower the guns easily. The cannon unit itself
came from an unknown box shape, the barrels themselves being the red hydraulic
legs from a previous Thunderbird 2 kit, the large Aoshima one. They were glued
to the back wall of the box and a styrene section fitted over each one to
produce the cannon arrangement. Kit parts were added as extra detail. The
cannons rotated and elevated successfully, so I primed the unit and then
sprayed it in Mandarine Red, my favourite acrylic car spray of that colour.
Weathering consisted of a liberal going over with graphite from a lead pencil
rubbed on sandpaper.


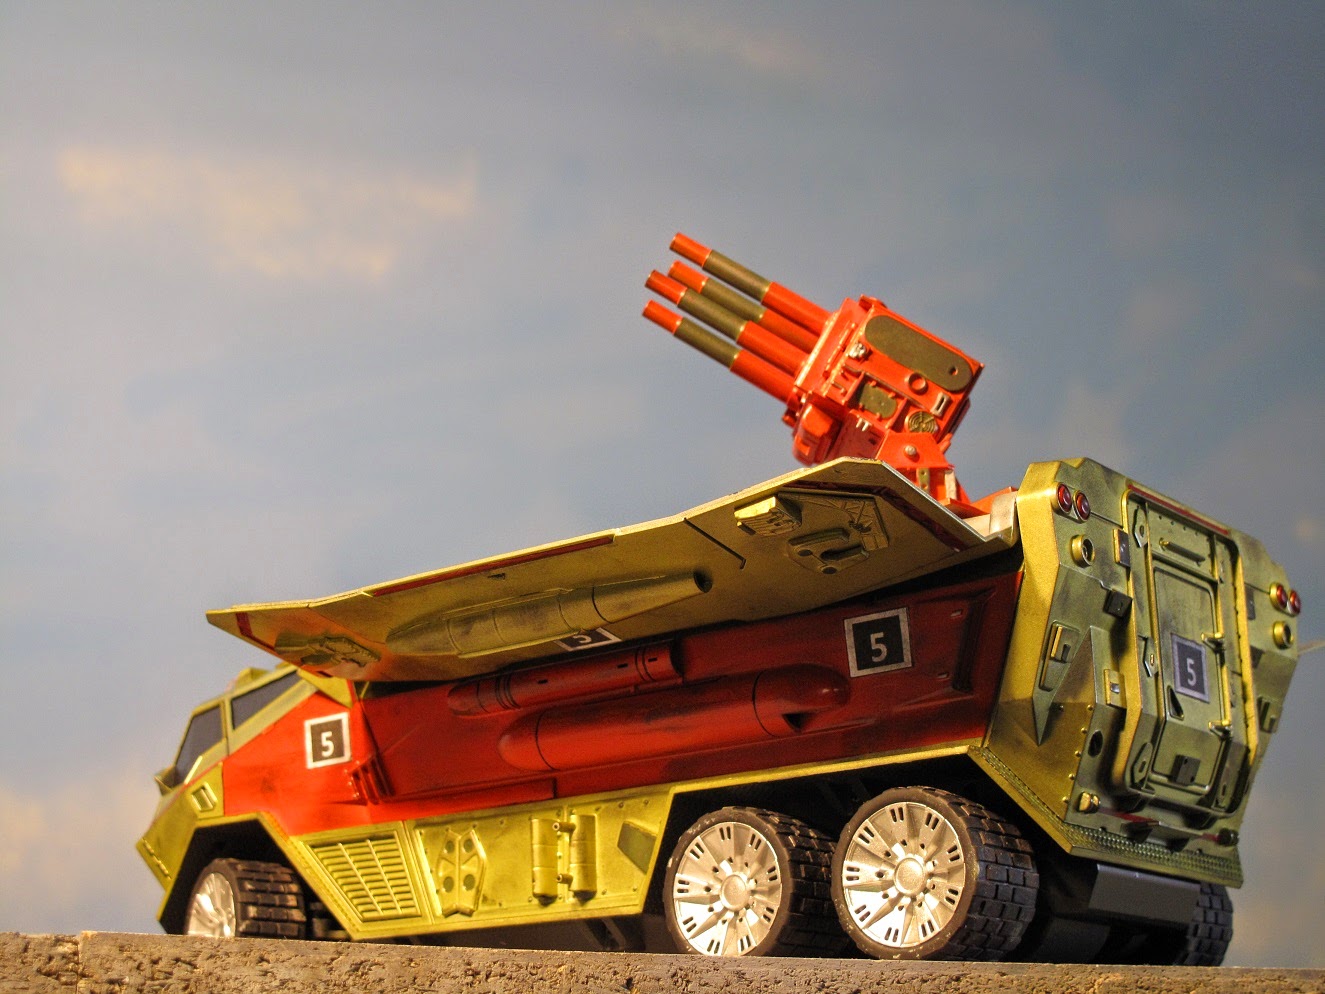
The colour I was going to use on the vehicle was called Rover Applejack,
a spray can of which I had, in the weeks previously, had my local car accessory
shop mix up for me as a possible Thunderbird 2 shade. It was completely wrong
for the Big Green Giant of course, but not too bad a shade for my Perimeter
Defence Vehicle as it had now been christened. I suppose it would be termed a
kind of greeny-gold colour. After a couple of sprays and then left to
thoroughly dry, I masked off both the left and right side areas to spray some more
Mandarine Red to add some variation. The underside of the vehicle was sprayed with
a dark gunmetal colour after more masking.


Further detailing consisted of some
subtle handbrushing in Tamiya Flat Red, Tamiya Aluminium and a dark green
colour on some of the areas and kit parts scattered around the vehicle. The
opaque windscreens was carefully painted in Tamiya Soot. Chrome tape was
affixed to the rear view mirrors to simulate their reflective nature. Red
pinstriping tape, trimmed down from the 3mm width was added to various areas,
with tiny blobs of Superglue to secure it to the paint. A few etched lines were
filled in with a fine-tipped pen while, once again, graphite from a lead pencil
was rubbed over the model to add weathering. Lettering was printed in the
computer, cut out and secured with PVA glue. A clear layer sealed everything in, after which the masking for the lights and tyres was finally removed.
Overall, I spent about three solid days on the Perimeter Defence Vehicle.
The cost of the original truck was only $3, while everything else was already
in my shed. A very inexpensive toy can result in a neat looking vehicle ready
for future use!


No comments:
Post a Comment