SECURITY VEHICLE SV-17
The Cheaper the Toy, the Better!
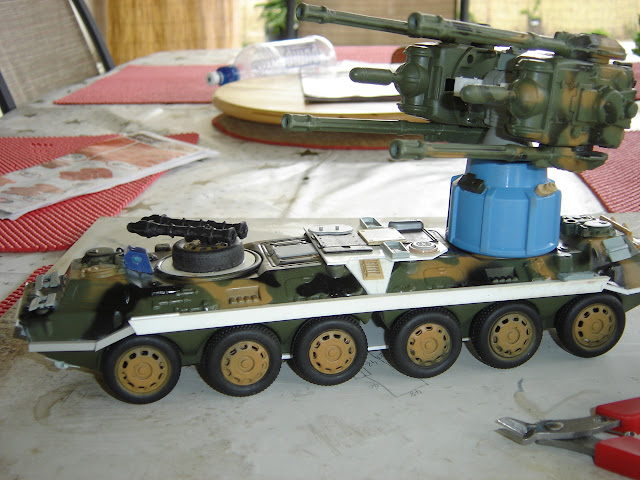
This model began life as a pair of cheap, armoured car toys that I purchased tor $3.00 each from a “cheap ‘n’ nasty” shop. Joining them, rear-end to rear-end, produced an interesting vehicle shape that I was able to build upon. With the addition of an agricultural water fitting to the top, I joined the two double gun units together with a piece of brass tubing so as to allow some rotation. In fact, except for the agricultural fitting, brass tube, some styrene sheet and Evergreen strips, a tomato sauce top for the cannon rotation and a few plastic kit parts, the entire vehicle is constructed from the parts that came with the original toys. Total model cost: $18; the most expense incurred was the paint!
(Above) The original toys pieces before any joining and construction. It took many hours to trim the various sections with a sharp scalpel as this Chinese-made toy was quite rough and consisted of a type of plastic that was particularly difficult to trim and sand. The cannons and rockets are removable, for transportation purposes.
The pair of armoured car toys were joined together, rear-end to rear-end. The blue section supporting the twin cannons is an agricultural water fitting. Inside it is the top from a tomato sauce bottle, providing the rotation of the guns which are joined in the middle by brass tubing inside another toy part. The basic colour scheme was selected to be yellow and red, just because I happened to have those two colours on hand!
The completed model before commencement of painting. The white areas are styrene sheet and Evergreen strips. A few kit parts give some much needed detail to the construction. They were carefully placed to seem as if they actually belonged to the vehicle. The Evergreen strips are there to cover up the large, gaping seam lines along the flanks of the original toys, as well as to disguise the joining of the pair of armoured cars.
After grey and then white priming, the base colour was sprayed from a can of acrylic auto paint. The red areas were hand brushed in Tamiya acrylics, while the panel and detail lines were drawn in permanent black felt pen. The wheels were painted separately. Weathering consisted of spraying a dark grey, through the airbrush, onto a business card stencil to give straight edges.


