BEHIND THE SCENES PHOTOGRAPHY
A FEW SMOKE AND MIRRORS TECHNIQUES

I've received quite a few
positive comments on my photography techniques in the past few months, so I
thought the time was nigh to list some of them down in the hope that others can
benefit from my many 'fumblings' in this area. Presenting your completed pride
and joy in a realistic photographic situation is just as important as making it
in the first place. As I've mentioned many times to the guys in my local
modelling club, 'put it on a display base', don't just throw it on the table as
it were. Your model will attract more attention if presented in a dramatic and
interesting manner. The same goes for photography. A realistic and clear photo
will go a long way in convincing others that this is something special, not
just another kit of a car, a King Tiger or even a Killrathian Battle Cruiser.
It needs to look at home in a setting that is as natural for it as possible.
Diorama makers know this only too well and that is why so many of them are
model makers that make me want to study their creations in even closer detail.
Many years ago, far more
than I care to remember, I used to collect behind the scenes photos from
special effects TV and movie sequences. These, as far as I was concerned, were
the 'Holy Grail' for many of the fans out there who were interested in studying
FX techniques. Nowadays of course you just can't escape the many behind the
scenes docos that DVDs offer to show you how it was all done. In the past these
gems of viewing pleasure were fairly rare, and they were keenly sought after by
myself and others. My favourites were the photos showing the models being
filmed, either hanging on wires, positioned on a tabletop miniature set or
being shadowed by a remotely-driven motion control camera. These days of
course, all the fun has been taken away with the predominant use of computers
to create the imagery instead of using models. What one sees behind the camera
is completely at odds with what will eventually appear in front of the lens
-scaffolding, power leads, smoke machines, lighting setups, backdrops,
technicians, etc. - just to get that one important shot of a model that looks
real on screen. I'd already seen the model in a movie - I wanted to see all the
rest that went into getting that shot in the first place, the 'nitty gritty' as
it were.
What follows is mainly a
pictorial essay illustrating some of the many techniques I've picked up over
the years. Some of them will appear to be basic common sense to those who have taken
model photographs before, however in the pre-digital times things were a lot
more difficult to achieve as the earlier photos show. I'm not the world's best photographer, I'm the first to admit that, however if you'd like some inspiration and basic techniques to help improve your own efforts (and you're not a computer geek, then perhaps this will help. Enjoy, and I hope you
learn something. Basically, if I've learnt what
not to do, then I'm more than happy!
September 11 2002 (Scanned
photos from originals)


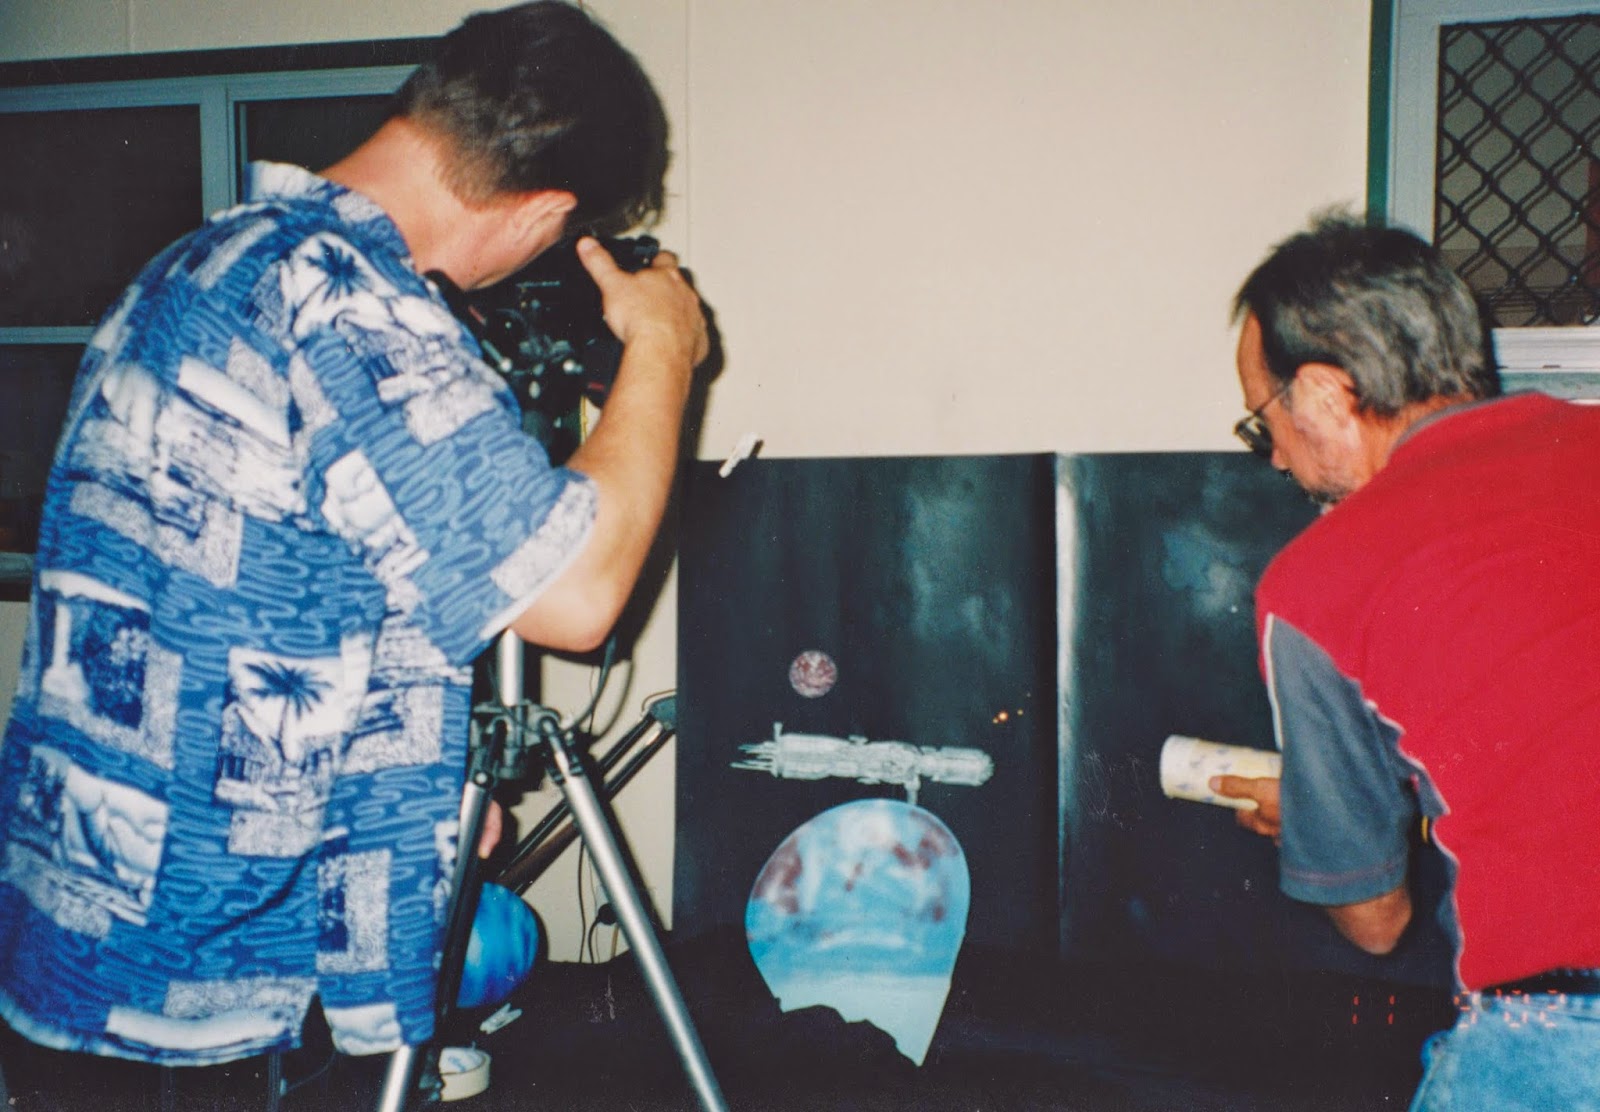 This was the setup on my
veranda at home to try to capture some space shots. Friend Mark was the
cameraman and I was the 'gopher'. The black background was a sheet of cardboard
with holes punched for stars. The models were permanently fixed to stands so a
cardboard 'planet' was positioned in front to hide them. The camera's shutter
was left open for anything up to 60 seconds (pre-digital camera at this stage)
at an F-stop of 22 or 32 for maximum depth of field in the tiny area. I used a
torch inside a tube to illuminate the model while the shutter was open. The
extra 'planet' was a small foam ball. The results were quite okay for the time,
if somewhat haphazard and time consuming. No digital enhancement was used in
any of these shots. The same setup was used for the following set of photos -
cardboard background, torchlight played over the model and 60 second or more exposures.
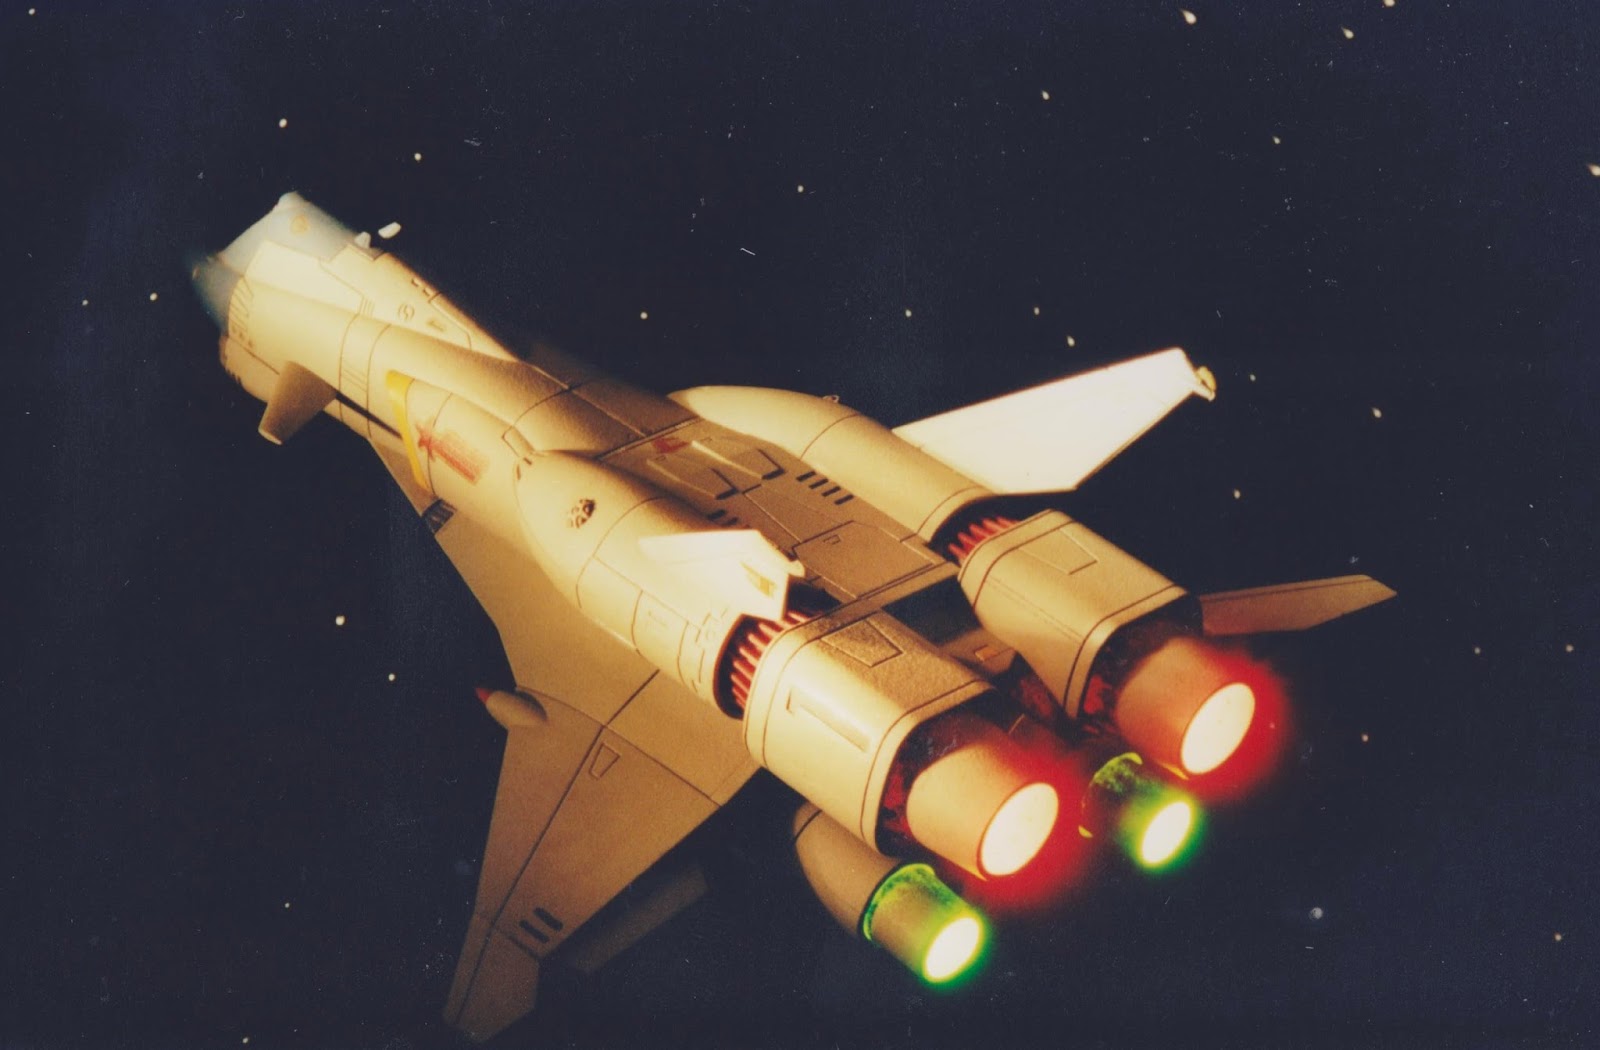
The engine flare on the Minerva Shuttle from "Crusher Joe" was a
reflective accident and looked like it should have been there, so it stayed!
The engine lights were practical and built into the model kit.
This was the setup on my
veranda at home to try to capture some space shots. Friend Mark was the
cameraman and I was the 'gopher'. The black background was a sheet of cardboard
with holes punched for stars. The models were permanently fixed to stands so a
cardboard 'planet' was positioned in front to hide them. The camera's shutter
was left open for anything up to 60 seconds (pre-digital camera at this stage)
at an F-stop of 22 or 32 for maximum depth of field in the tiny area. I used a
torch inside a tube to illuminate the model while the shutter was open. The
extra 'planet' was a small foam ball. The results were quite okay for the time,
if somewhat haphazard and time consuming. No digital enhancement was used in
any of these shots. The same setup was used for the following set of photos -
cardboard background, torchlight played over the model and 60 second or more exposures.
The engine flare on the Minerva Shuttle from "Crusher Joe" was a
reflective accident and looked like it should have been there, so it stayed!
The engine lights were practical and built into the model kit. 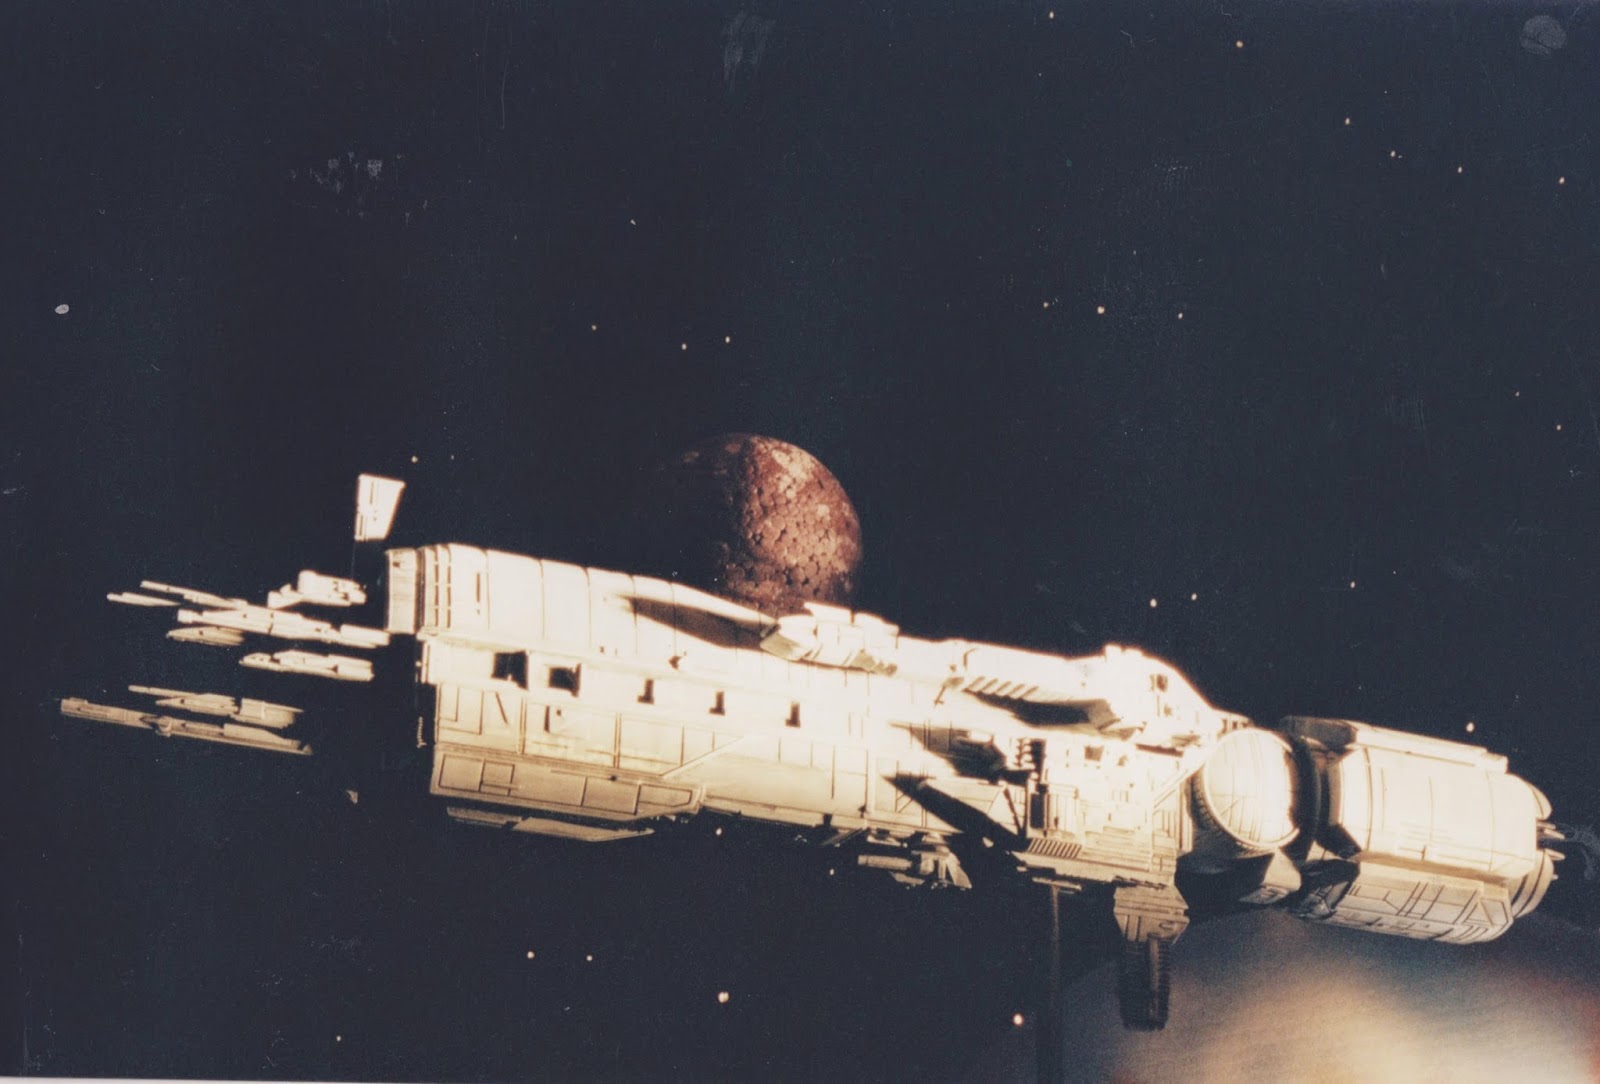

December 4 2002 (Scanned
photos from originals)
Mark and I had created an
extremely tiny tabletop set to achieve these following photos. The background was a
simple painted sky, with a cardboard cutout for hills and we had learned to
slope the set directly in front of the camera lens so as to provide
lower angled shots without the unconvincing out-of-focus foreground. However,
when you're dealing with a set the size of a small table, out-of-focus shots
are the norm! Camera exposures of up to 30 seconds were a given, as were small
aperture settings to achieve a suitable depth of field.
 |
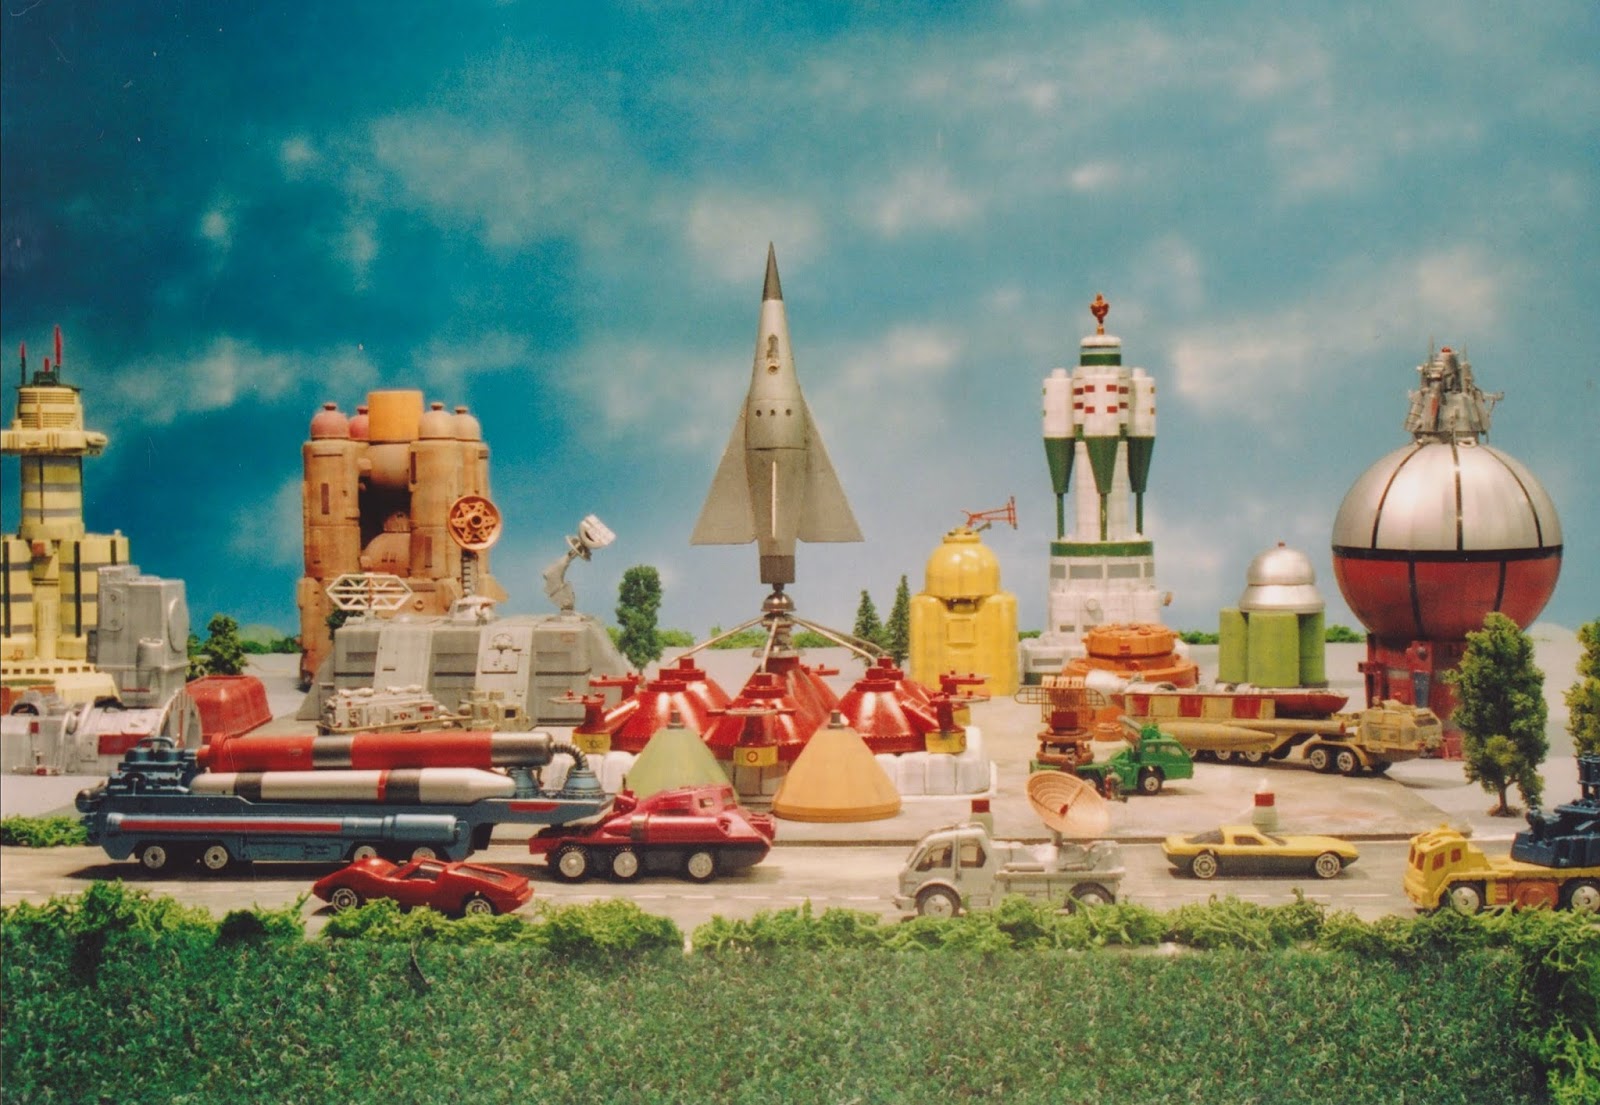
| Spot the awful problem with this old photo? Besides the out-of-focus foreground, the background doesn't match anything in front of it. Calendar photos need to be used more carefully than this early attempt. If I attempted a similar layout today, it would have turned out far better. (No digital manipulation, but perhaps this photo needed some!)) |
|
|
Moving from the veranda to the back yard shed provided me with a little more room to indulge my pictorial obsession. The basic layout remained the same - tabletop, painted backing and camera on a tripod. By now I was attempting to position as many small scaled buildings into my shots as was possible, with the end result being a complete disaster. The shots just looked wrong, far too crowded and with the camera being positioned way too high. They were fun to do, however they were unsuccessful.
April 12 2003 (Scanned
photos from originals)
Not owning proper studio
lighting, I was forced to take most of my photos in the great outdoors. What I
discovered was that during overcast or partially cloudy days, the results were
far more pleasing. Bright sunlight produced too much glare and made the shadow
areas too black. Cloudy days were just fine, so to speak. For the majority of
my photos lower angles yielded better results, especially when dealing with
scales as small as what I was building in. The following shots were taken in my
back yard under natural lighting. The 'sky' has been painted onto a large sheet
of Medium Density Fibreboard (MDF). F22 and F32 aperture settings have been
selected, along with a shutter speed varying between 1/5 and 1/250 of a second.
 |
| High camera angles can be effective for dramatic effect as in this shot. Generally they should be avoided however. | | | | | | | | | | | | | | |
|
 |
| The author hard at work in front of the shed. This black and white photo was taken by fellow modeller Arthur. |
Some
of my favourite shots of flying aircraft involve the use of a real sky
in the background. For some reason the photos just look more real when
the natural sky is utilised. (Then again, it could just be because I
hadn't yet learned to paint a decent sky background!) At times I lay on
the ground beneath the suspended model (thin fishing line) and shot
photos looking up at the aircraft against the real sky. A camera flash
was usually necessary to avoid a silhouette effect against the
brightness of the sky. At other times I simply held the model by wingtip and took
as many shots as possible to achieve one or two good ones. This was in
the days before I indulged in digital manipulation of course, so the
supporting strings sometimes showed, but a hand or fingers could be
cropped out of the shot. These days I'd use the computer to remove the strings or offending limb altogether.
April 25 2004 (Scanned photos from originals)
Setting up a quick
photographic tabletop is relatively simple once all the elements have been
constructed. All that's needed is a sky backdrop, some hill cutouts, a few bits
of railway foliage and a small table to set it up on. Sometimes, depending on
the subject matter, all that is required is the real sky, a model sitting on a
support of some kind and a comfortable spot on the ground from where to shoot.
Part 2
Not being a particularly
confident user of digital technology meant that I didn't obtain a digital
camera until fairly late in my photographic experiments. It was the best thing
for my photography, however I did become rather 'snap happy' and managed to
take thousands of photos in a matter of just a few months. Being an obsessive
collector of sorts means that I am unable to throw anything away, even failed
photos. Consequently, I have quite a few! Years ago a friend loaded Microsoft
Digital Image Pro onto my computer and he very kindly showed me how to
manipulate the photos in very basic ways, ie. removing support strings using
the Clone Brush function. Recently another friend loaded Paint Shop Pro for me
and I have been experimenting with that as well - touching up photos and
removing unwanted sections of the image. There's probably many more functions
that I need to learn about, however I prefer to achieve as much 'in camera' as
possible and use the minimum of digital manipulation afterwards. What follows
in this half of my article is a series of before and after shots - the
behind the scenes of the setup and the end
product. Nothing too experimental here, just the bare basics of a fraction of
what can be achieved, most with only minor computer work involved.
 |
| The basic setup in my back yard. The 'building' sits on a small table, while the tiny Helijet is suspended by a rod attached to a clothes airer! High tech stuff used here! |
 |
| After removing the support rod in the computer the shot looks like this. In the top photo I have also 'cloned' a section of the background foliage and added it to the front of the building, making the tree appear to be in the foreground instead of way back in the distance. |
 |
| Fellow modeller Dion holds the aircraft model above the building. The rod is removed and a section of the real cloud in the sky above is cloned to provide an exhaust trail. |
 |
| A pair of Transporter Mobiles sit on some green carpet with a real background in the distance. After some work in the computer, the 'grass' is extended downwards with the clone brush to improve the shot. |
 |
| The original setup for the XB-7 Bomber involved nothing more complicated than me holding the model up against the real sky, as well as taking the photo with my left hand. the brass supporting rod is removed and exhaust trails added using the surrounding clouds. |
 |
| The foreground is green carpet standing in for grass, the sky is roughly painted and smaller scaled items adorn the background to create a sense of perspective. The background 'horizon' is just a sheet of linoleum raised at the rear on hidden blocks. |
 |
| Another simple setup with a vinyl Godzilla kit and some plastic box buildings in a very small scale. Using the outside real sky as a background, the shots turns out like the ones below. Natural lighting, no added illumination. |
 |
| This setup took about half an hour to achieve. A small table, an old sheet, a painted sky (actually a failed attempt), some dirt and rocks from my backyard sloped up towards the rear, a couple of rough trees and another vinyl figure. Again, no extra illumination, just natural light filtering in from outside the shed. |
 |
| A more complicated setup involving a 'flying' model in front of my sky backing, using pillow stuffing as clouds and a smoke machine to provide additional 'atmosphere'. The only digital manipulation needed was to to remove the fishing line supporting the model. | |
 |
| The tabletop setup to achieve a tracking takeoff photo. The MDF sheet the model is suspended above was slid quickly backwards while the camera shutter remained open, resulting in a blurred surface to simulate a moving runway. A very simple set which resulted in the effective photo seen below. | | |
|
|
|
|
|
|
|
|
|
|
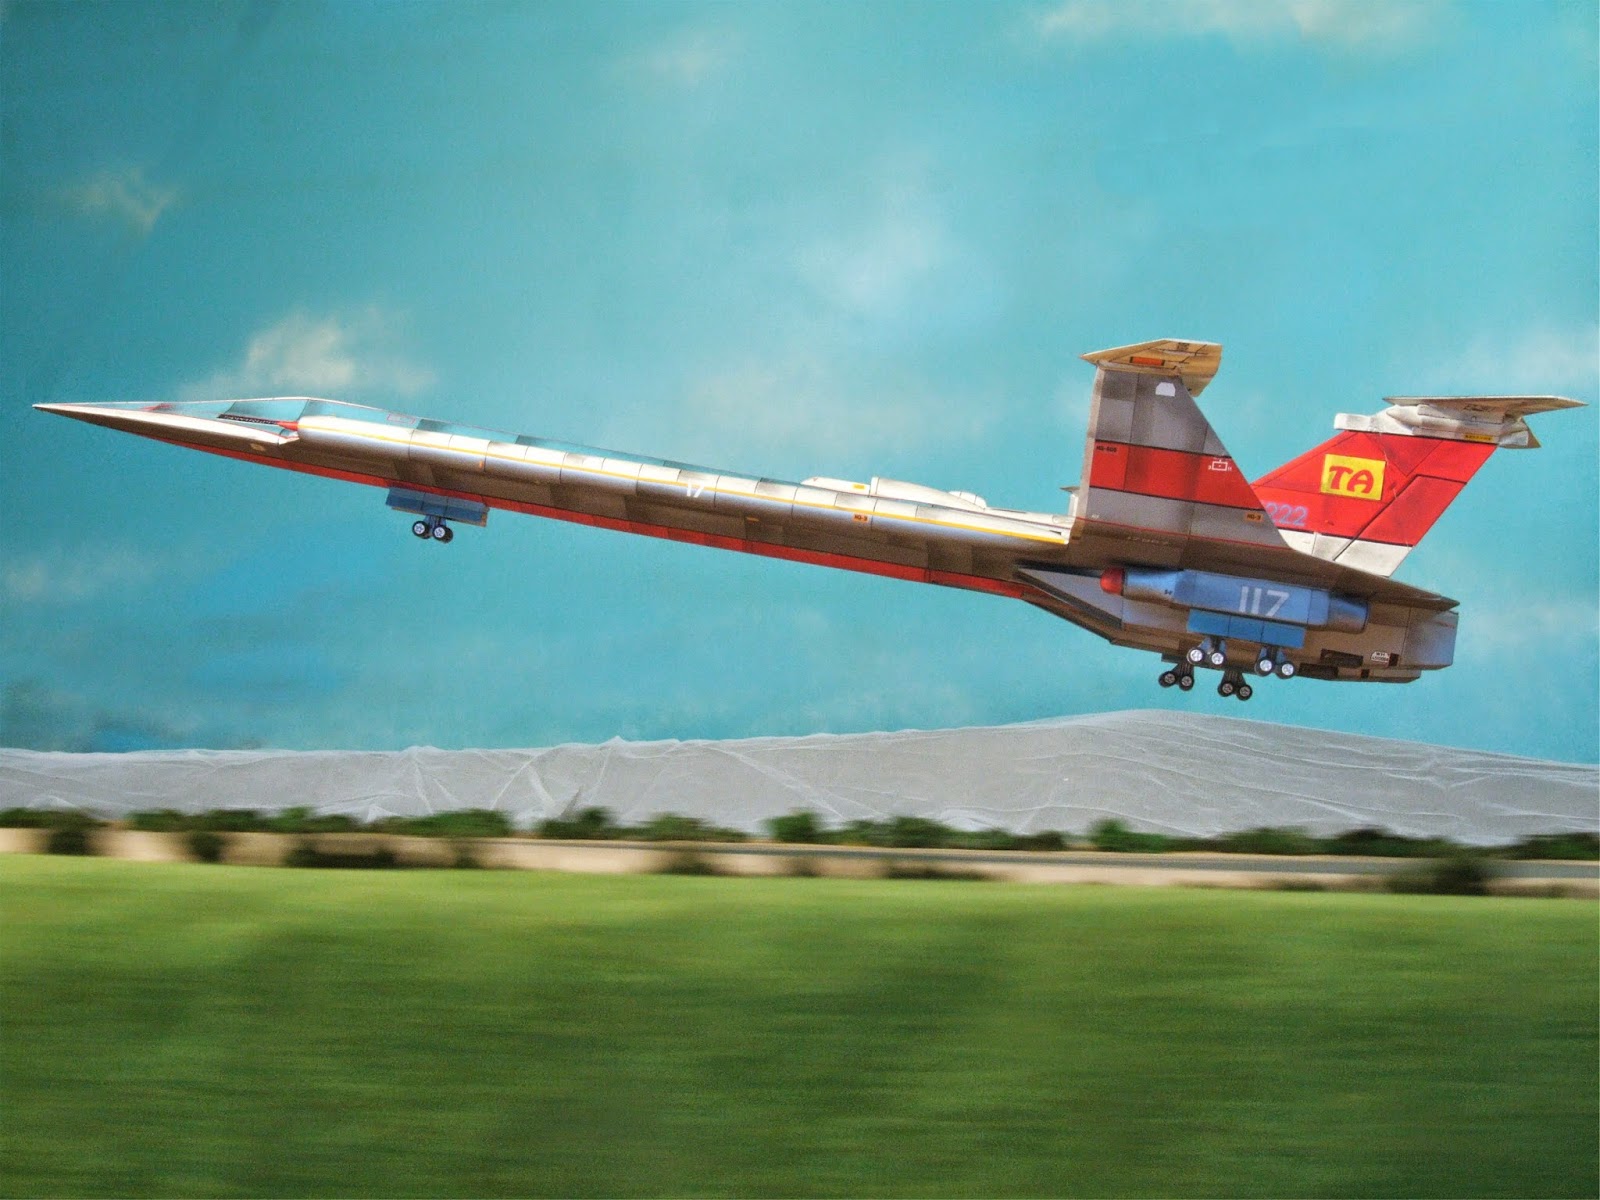 |
| The background 'hills' were created with the use of a wooden cutout which was draped in 'thule', the ultra-fine material that comprises wedding veils. This useful cloth softens and blurs the background to force the perspective of the shot. |
 |
| Using just a small portion of a homemade sky background, 6 metres by 3 metres, to hang a 1:48 scale model of Sky 1 results in the photos below, again utilising the clone brush to remove support wires and adding the exhaust trail. | | |
|
|
|
|
 |
| Having constructed a reasonably large sky backing, using plumbers' tubing and unbleached calico, I can now achieve low angle shots like these in order to make them a lot more dramatic, especially in the case of buildings and structures. |
 |
| Depending on the model subject and its size, sometimes all one needs is a small table and small background, a simple setup designed to show off the model itself and not the surrounding area. |
 |
| Building models in two different scales can also be used to enhance perspective. the Mobile Fuel Refinery in the foreground was constructed using a pair of 1:35 scale tanks, while the background version used 1:72 scale tanks of the same type. Even though the bigger model is not overly large, the bottom photo, using a low angle, creates a sense of size. |
 |
| A small scale (1:144) lunar base is illuminated from beneath the acrylic sheet it rests on by a halogen light stand. Using a sheet of black cardboard, pinpricked with small holes, I was able to achieve the photos below. Although not entirely successful because of the plastic border around the edge of the model to prevent the cement powder (lunar dust) from falling off, the photos do show that one can achieve decent results with very simple setups. Minor computer work was used on the plastic edging to make it less noticeable. |
 |
The LAB and launch area with its Aurora Shuttle were constructed recently, however I haven't yet tapped the full potential of photography for these models.
|
My latest creation is the Mars Lander Pegasus and I've managed to take a few shots that I'm quite proud of, considering that very little CGI is involved. The basic removal of support stands and fishing line was involved, along with the addition of a few stars in the background, but that was it.
 |
| The basic setup in front of a black bedsheet - very high-tech and all that! The support stand, a plastic tube, will be removed in the computer and stars will be added. |
 |
| The 'planet' was a cardboard, hemispherical potplant base that I picked up for a dollar. It was suspended in front of the model and rotated during the shot to blur the ouline. The support for the Pegasus has been removed and stars added in the computer. |
 |
| The setup for landing shots took all of an hour to get ready for shooting. The model was suspended with fishing line over a bedsheet covered with sifted dirt from my backyard. A sloping foreground and background hills completed the illusion, aided by the use of a smoke machine to create 'atmosphere'. | | | | | | | |
|
|
Hope you enjoyed this photographic essay and that it helps in some way to improve your own setups. Above all, keep on experimenting!
Cheers, Space Captain Greg Martin