SMALL SCALE AIRLINER
JUST TO APPEAR IN THE BACKGROUND!
Just a little quickie this time. I managed to acquire a tiny
kit of a DC-10 by Nitto for about $5 and, since our local model club was
putting on a display at Sugar City Con over a weekend here in Mackay, I decided
to make a start on it whilst manning our tables and ogling some of the ‘cosplay’
people parading around.
The kit was in the strange scale of 1:310 – extremely small
at just 17cm in length, but I thought I could do something interesting with it
for use in far background photography shots. Besides, this miniscule jetliner
would give me a short break from the rigours of adding hundreds of 3mm x 3mm
reflective tape windows to my latest major creation, the Mars Orbital Platform
‘Sigma’, a mammoth project that had lasted many months and was still incomplete
and ongoing to the point where I required a rest from it.
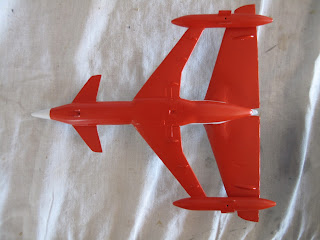
I assembled the fuselage of the aircraft and proceeded to
add additional wings from an Airfix Red Arrows Hawk in 1:48 scale which had
been started already, albeit in an extremely rough fashion. I first removed
some of the airliner parts and Araldited the Hawk’s wings onto either side of
the DC-10’s dorsal engine, after removing the vertical stabiliser. I also added
a pair of drop tanks from the Hawk to the resulting space between the airliners
rear wingtips and the outer edges of the new Hawk’s wings. Slots were cut into
the droptanks to insert the new wingtips. The miniscule landing gear was
carefully assembled as per the instructions and set aside for later inclusion.
A small problem arose at this time. Because I had added the
wings and droptanks from the Hawk kit, the aircraft was far too tail heavy.
This was no worry if it was flying, however I had planned to include the
finished model as a background element in a photo shoot and it would have to
stand on its own landing gear so to speak. As the clear cabin window was
missing, and I would need to replace it with something else, I decided to add
some tiny ball bearings to the nose area to offset the extra weight in the tail.
In order to get the ball bearings into the nose, I had to saw off the original
nose to create a hole that was big enough to accept the lead balls. While doing
this, I had the brainstorm of lengthening the nose area entirely using another unknown
droptank section glued to the front and putting the ball bearings inside this
new addition, as well as into the front of the fuselage itself. After adding
the weights and, supergluing them in place and attaching the new nose, the join
was given a generous amount of putty to blend the two sections together. After
a little sanding and a more putty in certain areas, the model was ready to
prime. A little more filling and sanding resulted in a model that was now ready
for the paintjob.
The overall colour scheme was to be white and red – Polar
White and Mandarine Red to be more precise. This colour scheme inspiration came
from a background airliner that appears in airport scenes in “Thunderbirds” and
“Captain Scarlet”. Here, the Century 21 modelling team had placed an ordinary
airliner kit, painted white and red, in the background of just about every
airport shot. (Have a look – it’s there!) The white was sprayed straight from
the can, followed by a careful masking of the lower half of the aircraft for
the red colour. Since the decals were quite ancient to say the least, they were
sprayed with a matte varnish before cutting out the main section of the window
areas and placing them on the fuselage. A couple of tiny blue and red stripes
were also used from the decal sheet and added to either side of the new
vertical stabilisers. A few pencil lines and careful weathering with graphite
had the aircraft completed. I ended up not even worrying about replacing the
missing canopy piece as it will be virtually impossible to pick out in the
distant background.

Yes, it is quite rough in appearance, however it will only
be vaguely seen in the far distance below some buildings.
Cute? Definitely! (Maybe I should do a much larger version!)


